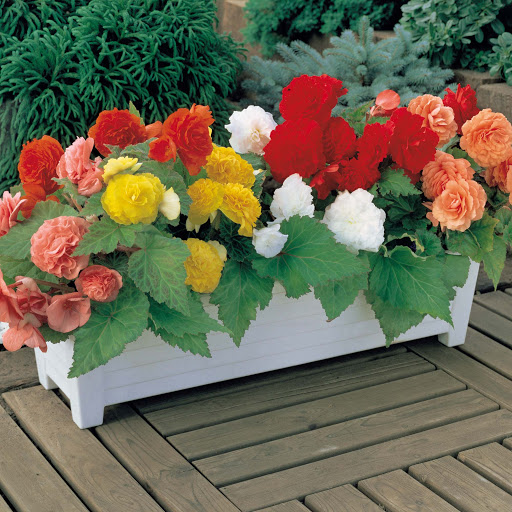
Tuberous begonias like these Nonstop begonias, don’t grow all year and will go fully dormant in the fall. Photo: griffinsgardencentre.ie
Tuberous begonias, mostly the large-flowered, double Begonia × tuberhybrida of which the ‘Nonstop’ series is perhaps the best known, or the smaller-flowered trailing B. boliviensis types, have a rather unique growth habit quite unlike other begonias (and there are literally thousands of non-tuberous begonias). They go dormant in the winter, losing leaves, stems and flowers, and then remain dormant for several months. They do this in all climates and whether they grow indoors or out.

This is important to understand, as otherwise you might be quite upset when your beloved begonia seems to start to fall apart in the late fall or even throw it out, thinking it has died!
When
In mild climates, ones where there is no frost, you can just let your tuberous begonia go dormant on its own, usually in late October or November in the Northern Hemisphere.
In colder ones, though, it’s best to let the first frost cut it back. That way, its leaves will have had the longest possible period in which to store energy for the coming dormancy. This makes for a sort of forced dormancy brought on by the weather. A first frost won’t damage the tuber, still safely underground where it’s warmer than the air above, but don’t leave the tuber outdoors until the soil freezes or that will kill it.
Curing the Tubers

In colder climates, once the foliage has been damaged by frost, you need to cure the tuber (harden it off). Dig up the entire plant including the tuber. Shake or knock most of the soil free and lay the plant in a warm dry area so it can dry out. This can take 2 or 3 weeks. When the tuber dries, the stems will detach on their own and can be removed and composted. After curing, shake off any remaining soil that comes free readily, but the tuber doesn’t have to be perfectly spotless.
If the tuber is in a pot, the treatment is much simpler. You can simply bring the pot indoors and let it dry as it is, removing the foliage when it comes free on its own.
In climates with frost-free, dry winters, just cut off the foliage and leave the plant outdoors. It will sprout on its own come spring and you can then start watering it again. However, in mild climates where winter rains are current, you’ll still have to dig up the tuber (if it’s in the ground) and put it somewhere dry for the winter, either indoors or in a shed, or do the same with its pot if it’s growing in a container.
?Helpful Hint: Make sure you identify each tuber with a label as you bring it in. Even if you don’t know the cultivar name, you’ll likely want to at least know its color and form (upright, trailing, etc.). That way, you won’t mix up your tubers when planning your garden come spring.
Winter Storage

You need a protected, dry location in which to store your tubers for the winter. Contrary to popular belief, though, it doesn’t have to be that cold. Tuberous begonias are tropical plants and, even when dormant, might find the near-freezing temperature inside some cold rooms too chilly. Temperatures between 40 and 55 °F (5 to 12 °C) are quite adequate.
You don’t have a cool spot where you can store your tubers? You can easily store them at room temperature too. However, warmer air means there will be more evaporation and thus some dehydration. That means you’ll have to take an extra step and moisten them occasionally through the winter, just spray them lightly with water every month or so (see below).
Traditionally, tubers are stored in the dark, but in fact, that really isn’t necessary. They’ll do just as well in a brightly lit spot as a dark one.

You can store bare tubers in a cardboard box, placing them on a layer of peat moss, vermiculite or sawdust, then covering with additional peat, vermiculite or sawdust, or wrap them in paper. I put mine in individual paper bags, stapling the label to the outside, then pack them together in a box. That way if any insect or disease has followed one tuber indoors, it can’t spread to the others.
As for tubers stored in pots, just pile the pots up somewhere one on top of the other.
Monthly Inspection
It’s wise to inspect the tubers monthly. Remove any that show signs of rot. If the tuber seems to be shrinking and wrinkling, just spray it lightly with water and it will plump up again.
Tubers stored in pots aren’t as easy to inspect but, being in soil, they’re somewhat protected anyway, so don’t tend to dry out excessively like loose tubers sometimes can. However, you may still want to sniff the pots to detect rotting tubers. They’ll smell like a rotting potato.
Come Spring

Tuberous begonias conveniently tell you when it is time to start a new growth cycle. The tubers start to sprout all on their own towards the end of the winter. There’s no need rush and immediately plant them at the first appearance of sprouts: they do start to grow, but then stop and wait for appropriate conditions before going further.
What you’ll want to do is to wait until about 6 to 8 weeks before the planting-out date in your area, then repot the tuber (if it was stored bare) or just bring out the pot and start gently watering again. To help the plant on the way to summer bloom, place it in well-lit spot indoors at normal room temperatures.
In no time, your begonia will be in full leaf and shortly after, in full bloom as well, just what it takes to properly launch your new flowering season.
I grow begonias from seed. Some develop tubers by Fall time which I can store over winter. But some don’t. Can I successfully take cuttings in the Fall? Will these cuttings develop roots and a tuber through the winter?
I’m in zone 8b and have been leaving my begonia tubers to overwinter under a protected eave in their own dry container soil covered with a tarp during rare freeze events. Thanks for pointing out that this is okay. I had begun to think that this was never advisable, but being a truly laidback gardener in a mild climate I was never going to dig those puppies up!
?
I’ve always had the best success keeping my tubers in their pots over winter: seems like the surrounding soil keeps them perfectly hydrated, not too wet, not too dry. But I thought I had to keep them in a cool-but-not-freezing space. Really, I can bring the pots into the house once they’ve gone dormant and just store them in the basement? It’s usually around 65 down there. Hope to hear back about this – thanks!!
Sure! Not a problem at all!
Ah, I remember these were still popular when I was a kid. Without Antonelli’s, not many nurseries grow them anymore.