


Following in the footsteps of the poinsettia, the amaryllis is another sure-fire hit in the floral world of the holiday season. With its spectacular flowering, the plant arouses interest and curiosity. Its popularity has not waned since its introduction in the second half of the 17th century. Today, there are over eighty species, all native to South America.

Steps for Propagating Amaryllis by Seed
Although amaryllis is often propagated by taking the young bulbs that form at the base of the mother bulb, sowing is an extremely rewarding practice, especially with children! Even if the plants obtained by sowing require a few years’ growth before flowering, the technique is nonetheless flourishing, since a single capsule (the fruit of the amaryllis) can produce over 200 plants. Interesting, isn’t it?
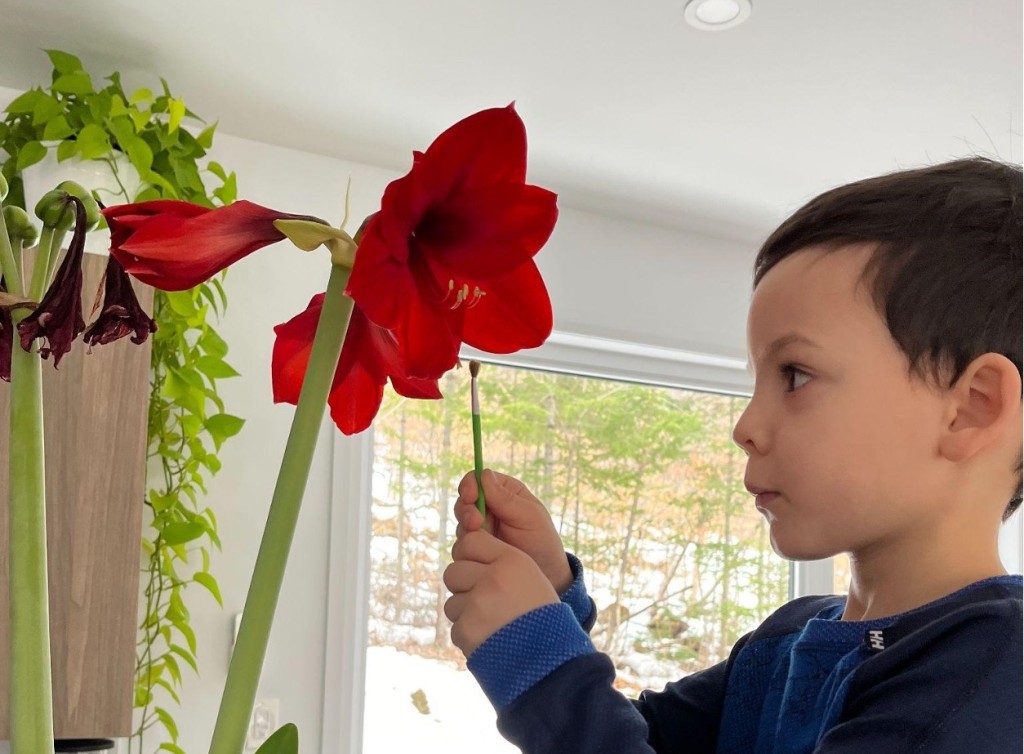
However, if there are no pollinators in the house, you’ll have to carry out this important task yourself to ensure the production of fruit and seeds. The pollination method involves sprinkling pollen from the pollen sacs (the anthers on the stamens) onto the stigma (the tip of the pistil) using a small, soft-bristled brush.

Is the Pollen Ready?
Before proceeding with brush pollination, make sure the pollen is ready. You’ll notice that it’s powdery and that yellow grains will stick to your fingers when touched.


For the rest, you’ll need to be patient, as the Amaryllis fruit can take several weeks to produce, and its final ripening will require a few more weeks before releasing its beautiful black seeds, which are essential for reproduction.

Sowing Time
Once you’ve harvested the seeds, you can broadcast them into an open tray, as there are so many of them that sowing them one by one can be tricky. The potting soil we use is a general-purpose potting soil, but seedling potting soil and even vermiculite are of course perfectly suitable. Germination is rapid, and after ten days or so, the first seedlings are showing their first cotyledons.

And Repotting
It’s important to wait until the second or third leaf appears before transplanting into multicells. We work with multi-cell trays of 50 or 2” pots.


Short Production Schedule
Here’s a timetable based on planting the mother bulb in the second week of November. It is therefore intended as a guide only.
- Amaryllis flowering: around December 25
- Amaryllis pollination: mid-January
- Fruit ripening: end of February
- Sowing: mid-March
- Transplanting: end of June
- Flowering of new Amaryllis: 3 to 5 years after transplanting