If you visit an orchid show in your area, you will probably be tempted to buy some specimens that have recently been imported from Asia or South America. In the commercial section, you will usually find several foreign suppliers offering an impressive selection of orchids at reasonable prices. However, these plants are generally imported bare root and require special care when potted for the first time.
Orchids are imported without soil to make health inspections at the border easier
Health inspections of imported plants are essential for protecting our national botanical heritage. Recent (and not-so-recent) history is full of examples of negligence regarding plant health that has had a significant impact on our flora, such as the emerald ash borer (present since the 1990s) and Dutch elm disease (present since the 1940s). Customs officers are therefore trained to assess the health of plants upon importation and detect any that appear suspicious.
Plant inspection is possible because plant diseases are clearly visible on the foliage or roots. However, many diseases and infections lurk in the soil (or substrate) in the form of microscopic bacteria, fungal spores or insect eggs. Consequently, not all ‘living soil’ can be certified ‘disease- or insect-free’ and will be intercepted by customs officers during health inspections. When imported plants are bare-rooted, i.e. clean and without soil or a growing medium, customs officials can focus on apparent symptoms on the plants (foliage and roots) and allow them to pass safely.
The import process can be extremely stressful for orchids
Even when handled by competent and proactive importers, the import process is extremely demanding for orchids. The process begins several days before the purchase transaction in the country of origin, when the roots are stripped of their growing medium, trimmed and cleaned thoroughly. The orchids are then placed in small transport packaging, often made of damp paper or wrapped in plastic film, before being stacked in shipping crates. Depending on the country of origin, transit time can vary considerably and extend over several days, including periods of storage and waiting for customs officials at the border.
It is not uncommon for an orchid to spend 5 to 8 days with a reduced and exposed root system, without light, without a normal hydration cycle, without any natural ventilation, and while enduring significant, even excessive, temperature fluctuations. In short, the orchid is deprived of all its basic needs, forcing it to minimize its natural activity and draw on its reserves to survive.
Surprisingly, most orchids survive these ordeals successfully. However, you can help this botanical miracle along by taking a few precautions when receiving the plants and during their initial potting. Here are some suggestions that you can incorporate into your gardening practices if they seem appropriate.
Step 1: Restore lost moisture by soaking the roots
This first step may seem obvious, but it is often overlooked or carried out incorrectly. Use clean, room-temperature water. Soaking should last at least 20 minutes, although very dry roots will benefit from a much longer soak.
Rooting fertilizer?
Although some fertilizer manufacturers suggest adding a rooting fertilizer to the soaking water, this practice is generally strongly discouraged because the plant’s low chemical activity means it cannot utilize this overly stimulating amendment. The ‘dehydrated’ velamen risks absorbing too much fertilizer, which will poison the plant when it tries to resume its normal water-absorbing functions.
A better solution
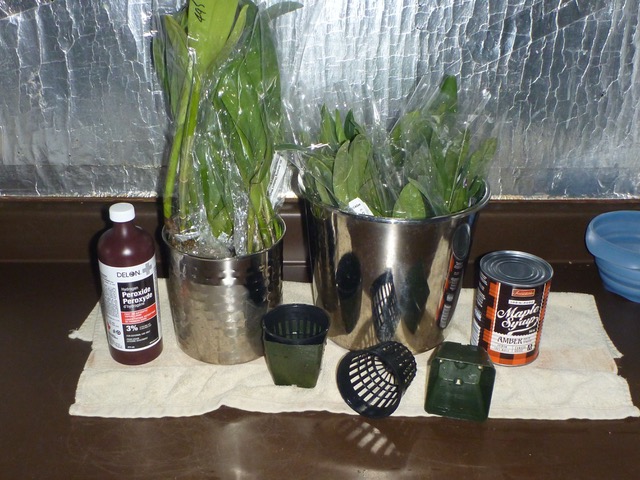
A much better option is hydrogen peroxide diluted to approximately 0.5%. Simply add one part hydrogen peroxide (H?O?) to five parts water to create a solution that will disinfect and stimulate your roots. The effervescence of the peroxide also helps clean the velamen, removing impurities and promoting recovery.
Some experienced orchid growers also recommend adding white sugar or maple syrup (5 ml per liter of water) to revitalize the plant. This sugary solution appears to act in a similar way to a blood transfusion given to a seriously injured patient upon arrival at the hospital. I have tried this a few times without achieving conclusive results.
I also tried soaking the roots in maple sap that had been kept in the freezer since the previous spring, but I didn’t observe much difference after a few weeks of growth. While I mention these practices, I don’t formally recommend them due to a lack of verifiable results. If you have experimented with these techniques, please share your observations in the ‘Comments’ section.
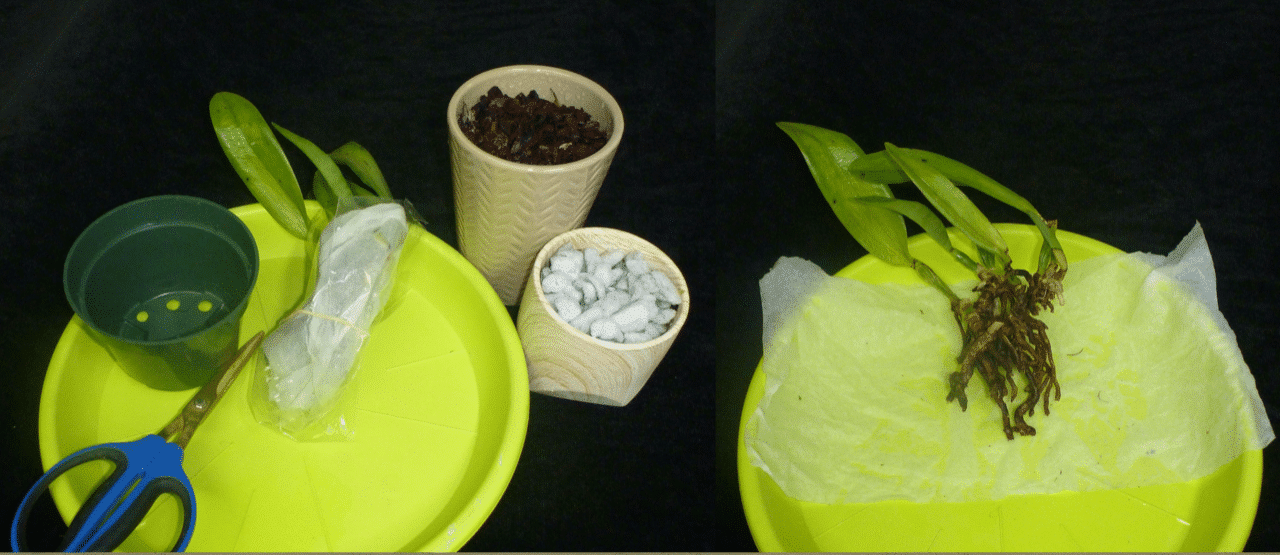
Step 2: Carefully examine the whole plant.
Before potting, it is important to remove any diseased, dead or damaged roots. This can easily be done using long-nosed scissors that have been cleaned and disinfected with 70% or higher alcohol. It is also helpful to treat wounds and other infected areas with ground cinnamon and allow the treated roots to dry for a few minutes. Depending on local regulations, some fungicides/bactericide may be available, but these must be used sparingly as the plant is vulnerable at this stage. Overuse could easily be fatal! For a quick reminder about orchid inspection, see the relevant article.
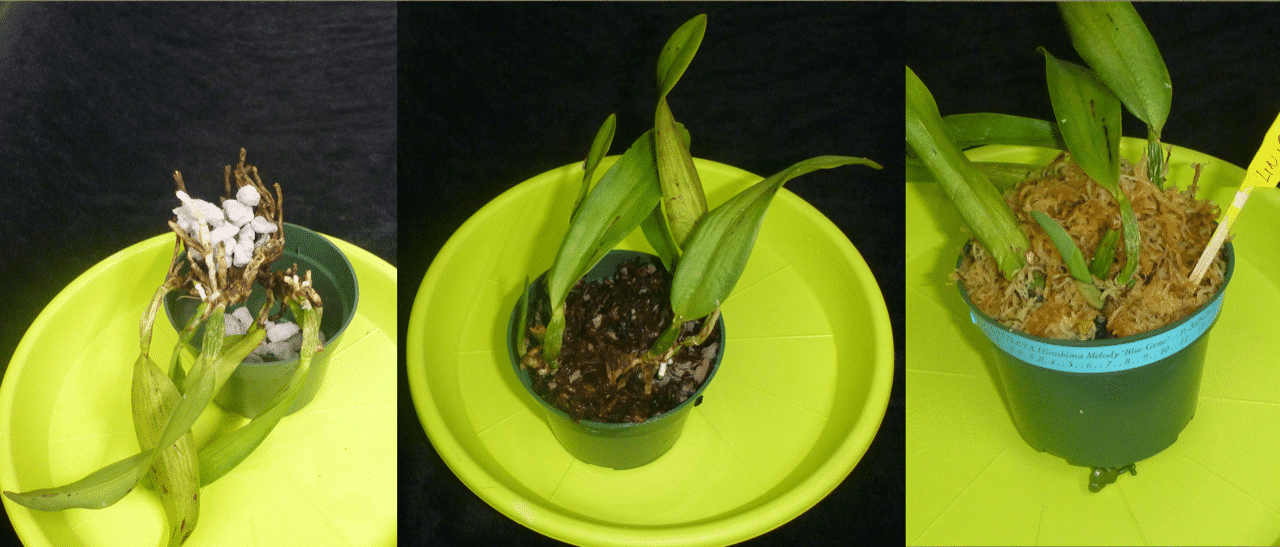
Step 3: Pot with the appropriate substrate for the species.
These days, most orchids are grown in bark, but some species, such as Brassavolas and Leptotes, prefer to be mounted on a plaque, while others, such as Vandas, prefer to have no substrate at all. If you are unsure of the specific requirements of your new orchid, consult reliable resources. Your supplier may also be able to suggest a suitable growing method. Personally, I try to choose a substrate that I am already familiar with, provided that the new plant can adapt to it. This way, there are fewer unforeseen problems and risks. Ultimately, the orchid will produce new roots that adapt to your growing environment.
Initial potting is quite similar to standard orchid repotting. However, you must ensure that you place some substrate between the roots to prevent them from touching once the plant is in the pot. Otherwise, insufficient air circulation and a very limited water supply would cause significant damage to the root system in the short term. The process is quite easy: simply invert the plant. With the roots facing upwards, you can easily insert small amounts of potting mix between them to create a fairly natural-looking root ball with an alternating pattern of roots and growing medium. If you are not used to repotting orchids, I suggest reading Larry Hodgson’s excellent article from 2020.
Identify your orchid
At this stage, don’t forget to add an identification label to the pot (or arrangement) indicating the potting date. If the plant is not already labeled, I recommend creating a label with the genus name, flower color, potting date and supplier’s name. You will find this information useful in the future.
Step 4: Spray the foliage with neem-based insecticidal soap.
Although optional, treating with insecticidal soap is highly recommended. This preventive treatment aims to reduce the risk of future infestations, which could be devastating for an orchid that is already weakened. A multitude of commercial products are available from garden centers.
My personal recipe has been published before, but here it is again in case you missed it. Mix 10 ml of Murphy’s soap, 15 ml of neem oil, 300 ml of 3% hydrogen peroxide and 600 ml of water in a one-liter spray bottle. Shake well, then spray onto the foliage, avoiding the roots, and leave to dry. Murphy’s concentrated wood cleaner is a soap made with coconut oil and citronella. It is effective for insect control and is non-toxic to children and pets. It is also more economical than specialized products sold in garden centers.
Neem oil is available in drug stores, in the section with facial and hair care products. It has a very low-toxicity. After all, it is a beauty product. This vegetable oil adheres to the surface of the leaves and repels insects for several weeks. It reportedly contains enzymes (or hormones) that poison insects attempting to eat the plant’s foliage. For the best of both worlds, mix these two oils in the same spray bottle to benefit from the immediate effectiveness of Murphy’s Soap and the longer-term effectiveness of neem oil.

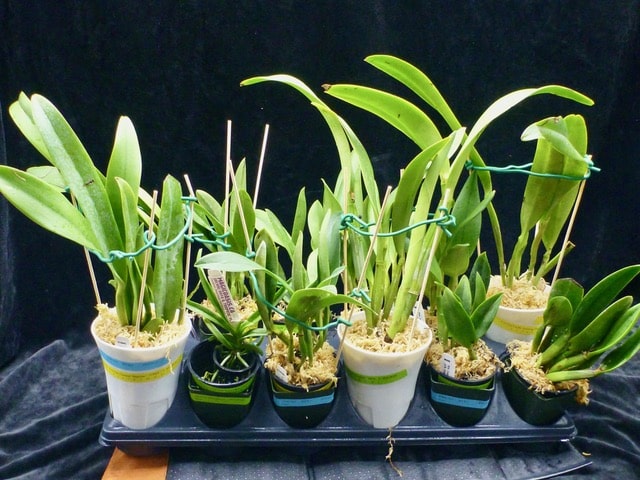
Step 5: Place the plants in an area with low stimulation, away from your collection
The newly imported orchid can now begin its slow recovery, allowing it to recover from any damage it sustained during preparation for export and transport to its new home.
To aid this acclimatization process, it is recommended that you reduce the light intensity by at least 50% for the first three months, and isolate your new plants from the rest of your collection. This period may be shorter if your growing conditions are similar to those in the orchid’s country of origin, but this is rarely the case for plants imported from Asia or Central America. This less stimulating period will enable the orchid to gradually regain its strength. Over time, the hydration/respiration cycles should re-establish themselves and return to a regular rhythm, indicating normal vegetative growth. Gentle and regular ventilation is particularly important at this stage.
Given how fragile orchids are during this period, it is best to avoid using any fertilizer that the plant cannot utilize in its current state. Another common mistake is to water too frequently, which keeps the growing medium constantly moist and encourages the growth of fungi and bacteria. Therefore, allow the growing medium to dry out between waterings, as you would for a healthy orchid. If you’re concerned about the plant becoming dehydrated, it would be better to increase the ambient humidity than to increase the frequency of watering.
Step 6: Be patient!
Orchids react slowly to changes in their environment. Remember that plants live in sync with their growing environment, so they lose all their environmental cues when they are imported. It may take up to a year for your new orchids to ‘re-synchronize’ with your environment’s growing conditions. While this may seem like a long time, it is quite normal for orchids, especially if your growing conditions differ greatly from those in their country of origin.
If you import orchids from the Southern Hemisphere, they often take two to three years to adapt, since the environmental cycles there are six months out of sync with those in the Northern Hemisphere. Orchids struggle to ‘reprogram their growth and flowering cycles’ because they lack two full seasons in their new environment, which is deeply disruptive. While they often recover, you’ll need to be patient and have realistic expectations for the first few years, which are typically flowerless.
Step 7: Inspect your orchids frequently while they are in isolation
My words may sound alarmist, but orchids are surprisingly resilient and will generally recover with proper care. Their water cycles will quickly become more regular, and the foliage will regain its natural rigidity — a sign that photosynthesis has resumed at a normal pace. You can then gradually increase the light level in two or three stages until you reach the level normally provided for a healthy, mature plant of this species. You can also resume your fertilization schedule at this point, but at a reduced dose, taking into account the moderate level of photosynthetic activity.
Regular and careful inspection of your collection is the best way to guide you through this process.
Selam arkadaslar, bence cevrim ici bir casino secerken ilk bakilmasi gereken sey lisans, odeme yontemleri ve platformun gercekten aktif bir topluluga sahip olup olmadigidir. Ben bir suredir Mostbet oyun kulubunu inceliyorum ve mostbet indir sayfasini kullanarak platforma ulastigimda ozellikle bahis, kumarhane ve poker seceneklerinin tek yerde toplanmis olmasini oldukca pratik buldum. Ayrica bonus sistemi de dikkat cekici; nakit iadesi, sadakat programi, risksiz bahisler ve dogum gunu hediyesi gibi avantajlar hem yeni baslayanlar hem de duzenli oyuncular icin gercekten motive edici gorunuyor.
Cok ilginc bir konuya deginmissiniz. Ben de merak ediyorum: Bir cevrim ici casino secerken guvenilirligi nasil daha iyi anlayabiliriz? Lisans, odeme yontemleri ve kullanici yorumlari gercekten ne kadar belirleyici oluyor? Bu konuda deneyimi olan var mi?