
It’s often in July that the tomato’s reputation as a diva really comes to the fore. Up until then, everything had been going well. You planted your tomatoes as described in How to Plant Tomatoes in Containers Without Messing Up and you’ve been looking after them according to the advice in How to Grow Tomatoes in Containers Without Becoming Their Slave. So why are problems starting to crop up? “But I’ve done everything right!”
One morning, you go out for a cup of coffee and notice flowers scattered on the ground, curled-up leaves or strangely shaped fruit. Diseases? Insects? Help!
Do you now understand why the tomato is nicknamed the queen of the vegetable garden?
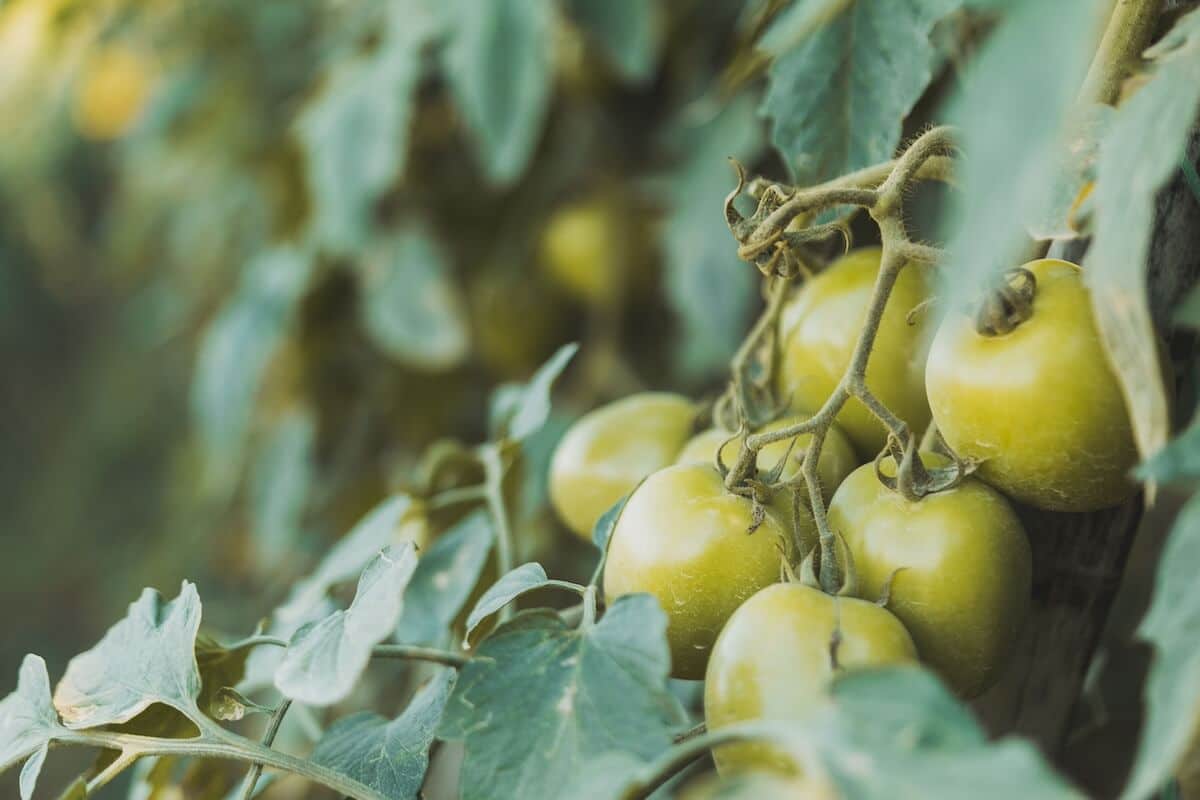
Don’t panic! Not every problem requires intervention. Some can be easily sorted out, whilst others have no real consequences. The real challenge lies in knowing when to take action and when to let nature take its course.
Let’s take a look at some of the most common problems you might encounter with your container-grown tomatoes… and elsewhere in the garden too!
Why are my flowers falling off?
Sometimes, certain flowers turn yellow at the base of their stems, dry out and fall off without ever developing into tomatoes. This is perfectly normal. A plant cannot nourish all the flowers it produces; it naturally selects which ones to nurture based on its current resources.
However, in the height of summer, when whole clusters fail to develop, this is usually a sign of stress. When grown in a container, the tomato plant is particularly vulnerable to the vagaries of its environment.
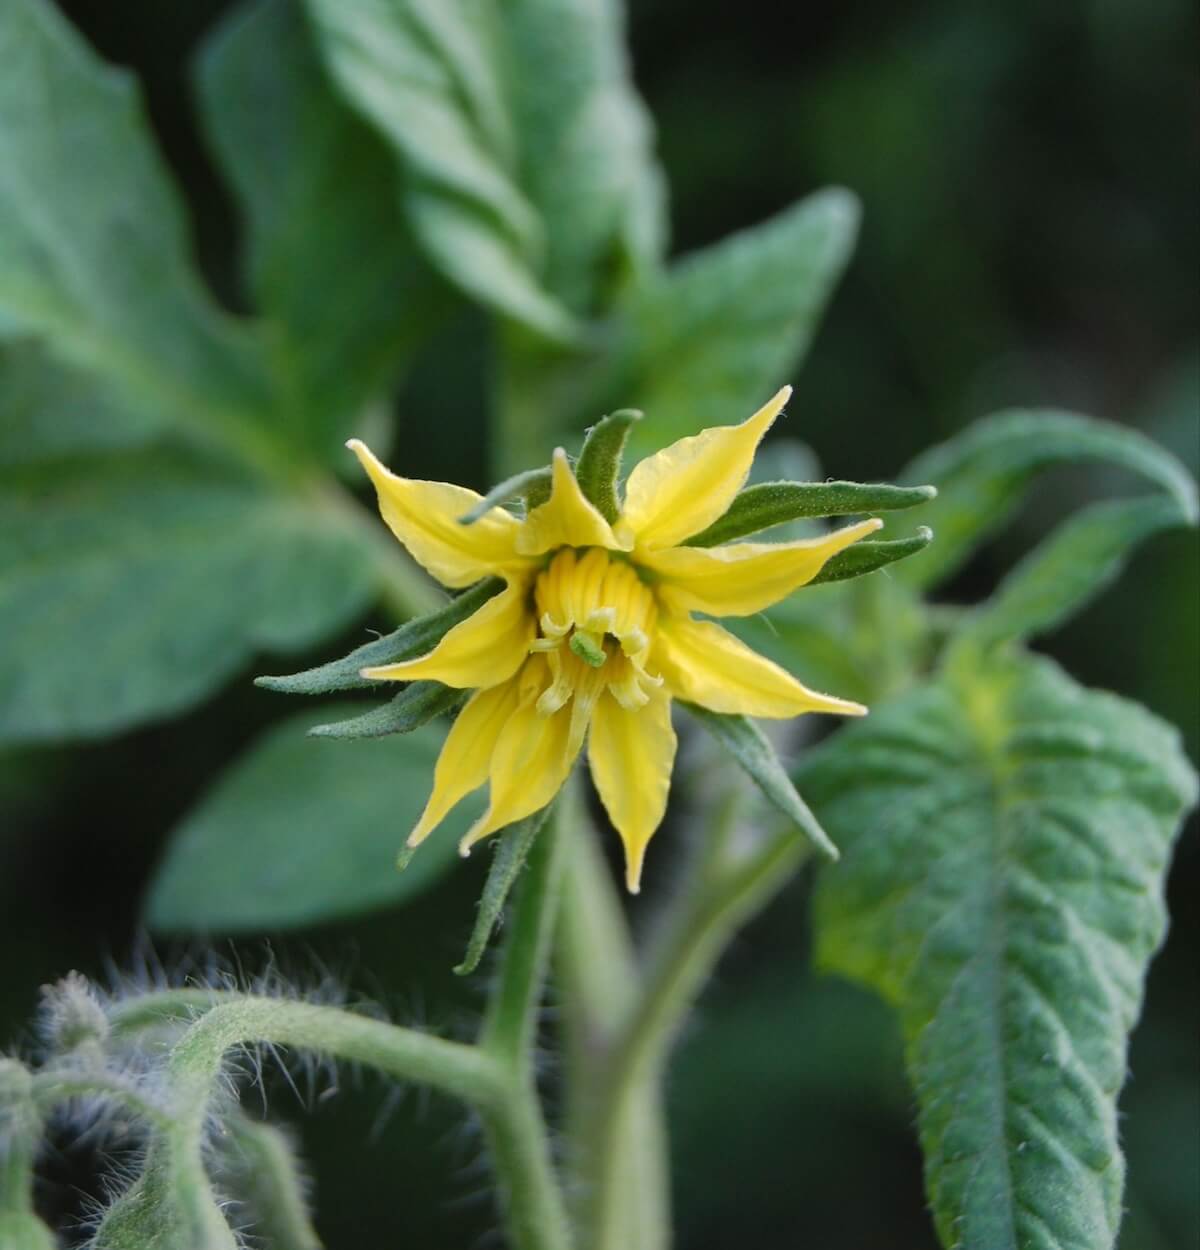
Excessive heat is the leading cause of blossom drop in July. When temperatures rise above about 30°C (86°F), tomato pollen becomes less viable and may even become sterile. Without successful pollination, the flower eventually falls off.
On the other hand, cool nights below 12–15°C (54–59°F) can also interfere with pollination. Under these conditions, the pollen becomes stickier and is released less easily.
Sudden swings in soil moisture are another common cause. Potting mix that goes from very dry to waterlogged after heavy watering can cause already-open flowers to abort.
High humidity can also make pollination more difficult. On a poorly ventilated balcony or when containers are packed closely together, pollen tends to clump instead of dispersing.
Finally, too much nitrogen encourages the plant to produce lush stems and foliage at the expense of fruit production. The result is a beautiful, vigorous plant that is far less interested in producing tomatoes.
Why aren’t my tomatoes setting?
Sometimes, the flower doesn’t fall off. It remains clinging to the plant, bright yellow, then eventually turns brown and dries out right where it is, without any small green fruit appearing at its base. The flower was there, but the magic didn’t happen. The culprit? Insufficient pollination.
On a high-up balcony, in a very enclosed urban courtyard or inside a small patio greenhouse, pollinators can be scarce. If there’s poor air circulation too, the pollen remains trapped inside the flower.
Unlike courgettes or apple trees, the tomato flower is hermaphroditic: it possesses both male and female reproductive organs and can self-pollinate. However, its pollen is relatively heavy and enclosed within small tubular structures. To reach the pistil, it must be released by vibration.
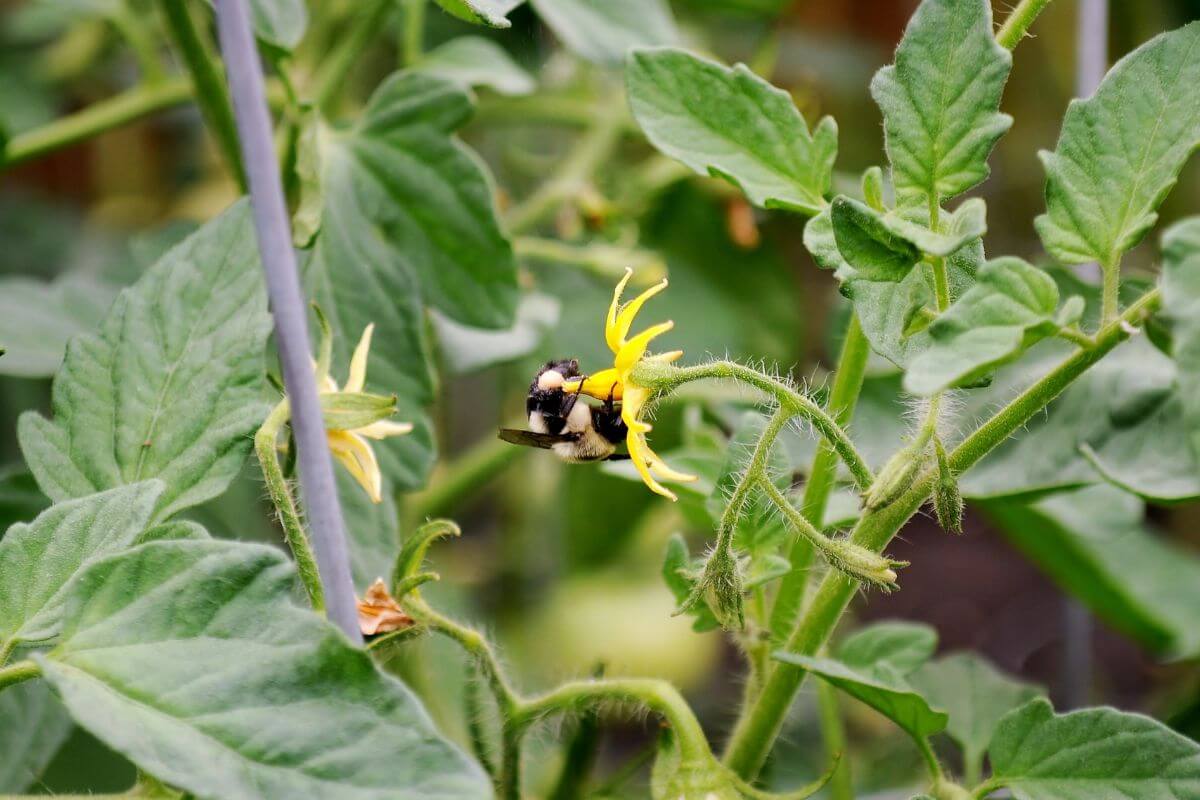
In nature, it is mainly bumblebees that carry out this task. As they visit flowers, they vibrate the muscles in their wings at a specific frequency. This vibration shakes the pollen loose, causing it to fall onto the pistil. Without sufficient vibration, fertilisation may fail.
If the bumblebees are giving your balcony a cold shoulder, it’s up to you to play matchmaker. Two or three times a week, ideally in the late morning when the air is dry and the pollen is light and fluffy, gently tap or shake the stakes, tomato cages or clusters of flowers. This simple action is often enough to improve fruit set.
You can also use an old electric toothbrush. Switch it on and gently press the back of the vibrating head against the stem bearing the flowers for a few seconds. It’s not uncommon to see a small yellowish cloud of pollen being released.
Why are my tomatoes misshapen?
Catfacing is a dramatic-looking but completely harmless disorder that can give tomatoes the appearance of something straight out of a Halloween movie. The blossom end of the fruit develops large brown scars, deep cavities, or swollen, misshapen areas.
This disorder usually occurs when the weather misbehaves during flowering. Cool nights—typically below 12–15°C (54–59°F)—can disrupt normal flower development and fertilization. Under these conditions, pollen becomes less viable and the fruit develops unevenly.
As the tomato grows, some parts of the fruit expand more quickly than others, resulting in the characteristic scars and distorted shape.
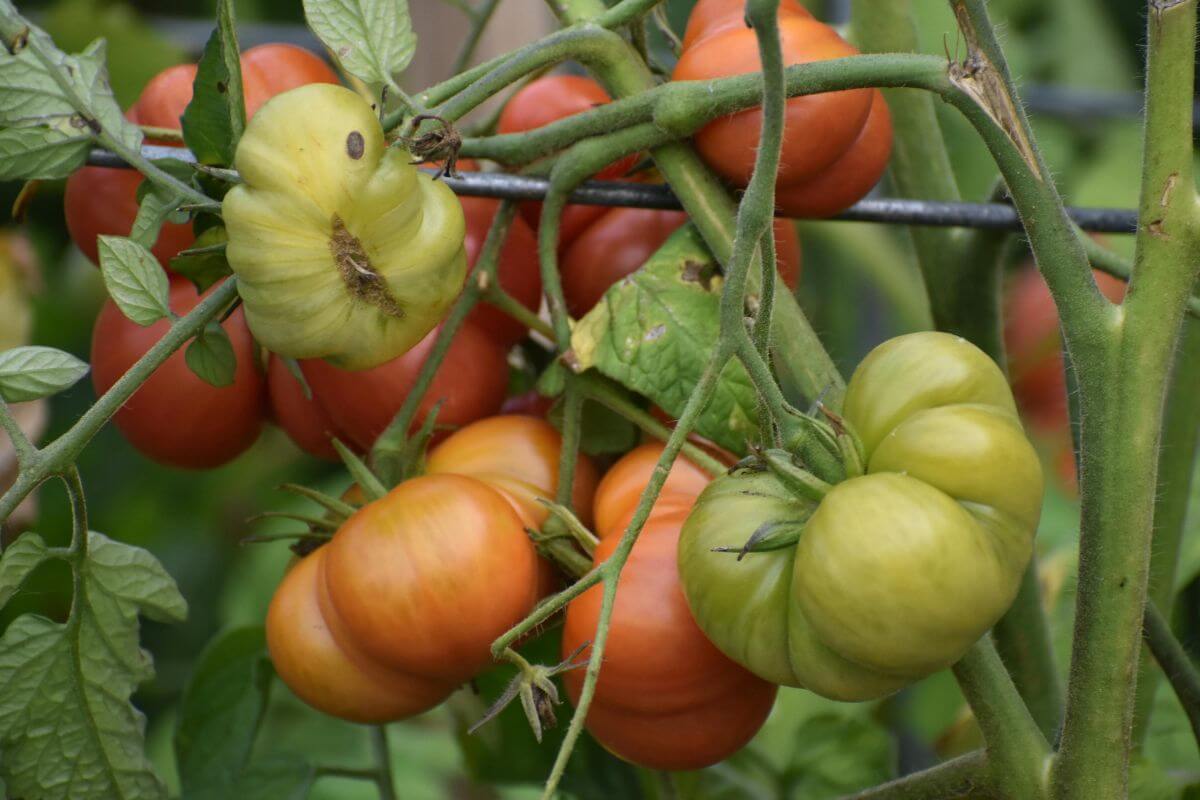
This condition mainly affects large, heirloom varieties such as Beefsteak tomatoes, whilst smaller tomatoes are generally less susceptible to it.
Fortunately, despite their strange appearance, these tomatoes are perfectly edible and often just as tasty as any others. Simply cut away the hardest parts with a knife before eating them.
Why are my tomatoes splitting?
There is nothing more frustrating than spotting a magnificent tomato that is finally starting to change colour, only to discover the next day that it is split from top to bottom or covered in healed cracks near the stalk.
This cracking of the skin is caused neither by insects nor by disease. Rather, it results from inconsistent watering. It is the classic consequence of water fluctuations.
Here is the typical scenario. Following a day of scorching heat or a missed watering, the potting soil dries out considerably. The plant suffers from thirst and the skin of the growing fruit loses some of its elasticity.
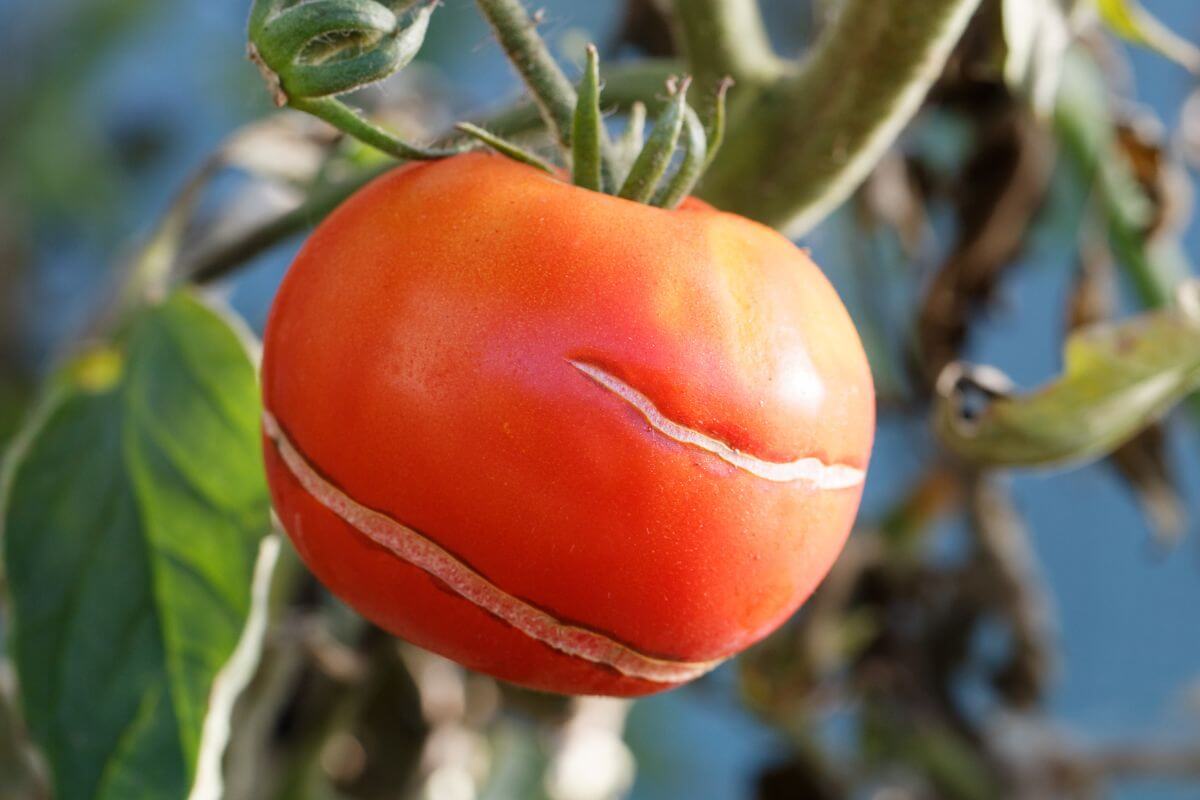
Then, overcome with remorse, you water the pot profusely… or a violent summer storm breaks out. The roots then absorb a large amount of water in a short space of time and channel it to the fruit. The flesh of the tomato swells rapidly, but the skin cannot keep up. The pressure builds until it cracks.
Tomatoes grown in containers are particularly prone to this problem, as the small volume of potting compost dries out much faster than garden soil. The aim is to keep the moisture level as stable as possible. Ideally, the potting compost should always have the consistency of a wrung-out sponge.
A good layer of mulch – straw, shredded leaves or coconut fibre – helps to slow down evaporation and keep the compost moist for longer.
Finally, if a heavy storm is forecast and your tomatoes are almost ripe or have already started to change colour, don’t hesitate to pick them. They’ll finish ripening just fine on the kitchen worktop.
Why do my tomatoes have black spots on the bottom?
Blossom-end rot appears as a brown or black sunken patch at the blossom end of the fruit. Despite its reputation, it is usually not a disease, nor is it typically caused by a lack of calcium in the potting mix.
As we saw in How to Grow Tomatoes in Containers Without Becoming Their Slave, the problem is most often caused by fluctuations in soil moisture that interfere with the movement of calcium to the developing fruits. Potting mix that repeatedly swings from very dry to waterlogged, or periods of intense heat that greatly increase the plant’s water needs, can both promote blossom-end rot.
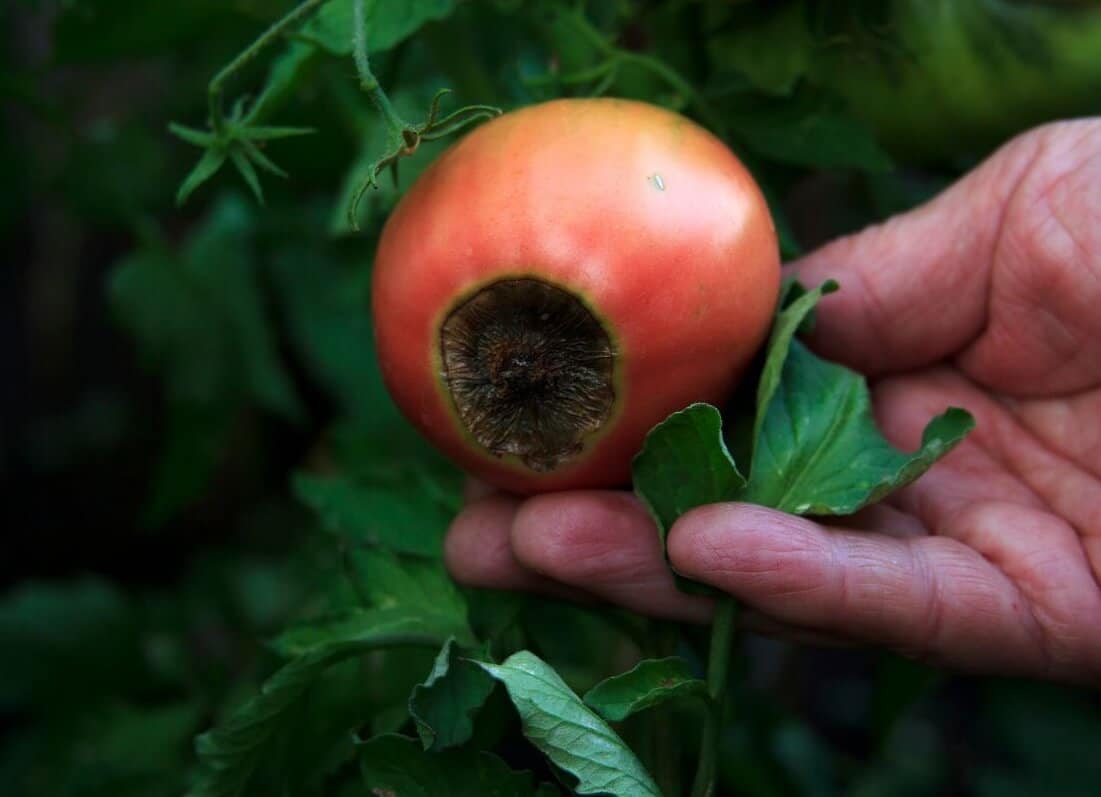
This is why adding eggshells or other sources of calcium rarely solves the problem: calcium is usually already present, but it does not reach the fruit at the right time.
Tomatoes grown in containers are particularly susceptible to this, as the limited volume of potting compost dries out quickly. The best solution is therefore to maintain as stable a moisture level as possible through regular watering and a good layer of mulch.
The good news? Affected fruits won’t recover, but subsequent ones will often be perfectly healthy once growing conditions have stabilised.
Why are my leaves curling up?
You step out onto the balcony and notice that the lower or middle leaves of your tomato plant are curling upwards along their main vein. Sometimes they become so tightly curled that they look like little green cigars.
The first instinct is often to suspect a disease or a pest. However, in the vast majority of cases, this phenomenon is completely harmless.
This curling is not a disease, but a protective reaction. By curling in on themselves, the leaves reduce the surface area exposed to the sun and wind, whilst trapping a thin layer of moist air around their pores (the stomata). In this way, the plant minimises water loss when conditions become difficult.
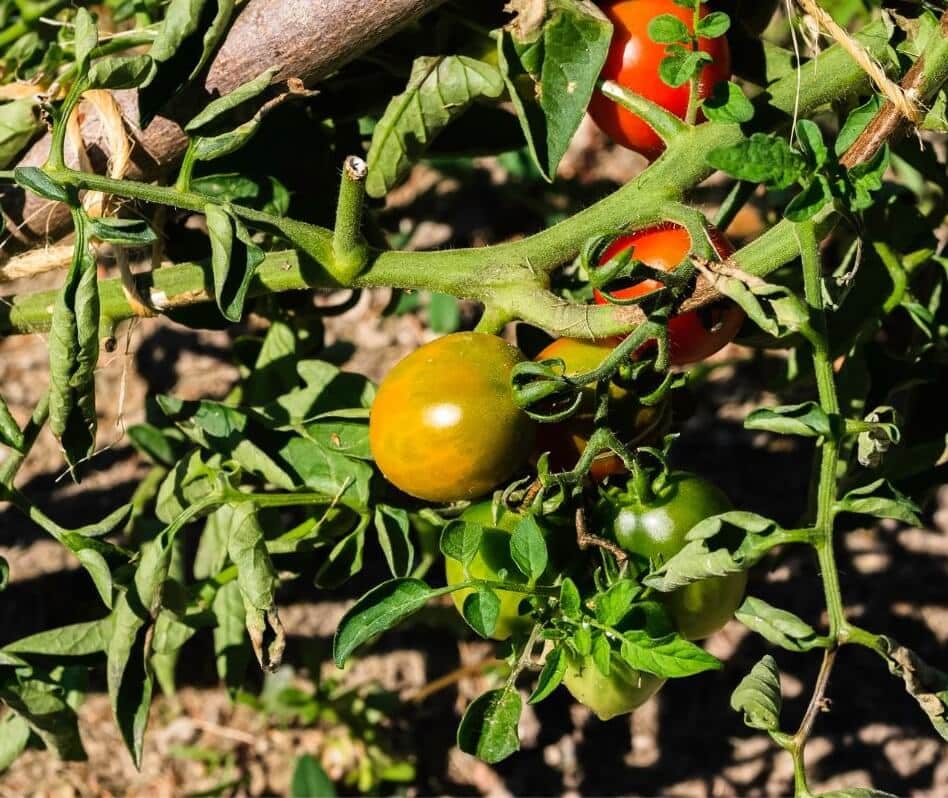
Intense heat, drying winds, fluctuations in potting mix moisture, or overly aggressive pruning are the most common causes. On an exposed balcony, leaves can lose water faster than the roots are able to absorb it. Likewise, potting mix that repeatedly alternates between very dry and overly wet can trigger this response.
Sometimes, gardeners are the ones responsible. Removing too many suckers or leaves at once suddenly reduces the plant’s leaf area, creating a temporary imbalance that can cause the remaining leaves to curl.
If the leaves remain green, the plant continues to grow, and the fruits develop normally, there’s usually no cause for concern. Simply maintain consistent watering and, if possible, protect the plant from drying winds.
Leaves that have already curled rarely return to their original shape, but new leaves will usually grow normally once growing conditions have stabilized.
The good news? This problem is often far more alarming to the gardener than it is to the tomato. In most cases, the best treatment is simply to leave the plant alone.
Why are my leaves turning yellow?
Yellowing leaves are undoubtedly the symptom that worries gardeners the most. However, a yellow leaf does not necessarily mean that your plant is in danger. It all depends on where the problem appears and how it develops.
If only the lower leaves are turning yellow, there is generally no cause for concern. As the plant grows, the upper foliage shades the older leaves. The plant then recycles the nutrients contained in these leaves to feed new shoots and fruit. The leaves turn yellow, dry out and eventually fall off. Simply remove them as and when necessary.
If the yellowing starts at the base of the plant and then gradually spreads upwards, accompanied by a slowdown in growth, a nitrogen deficiency may be the cause. In pots, frequent watering gradually leaches nutrients from the compost. Applying a fertiliser suitable for vegetables usually rectifies the situation.
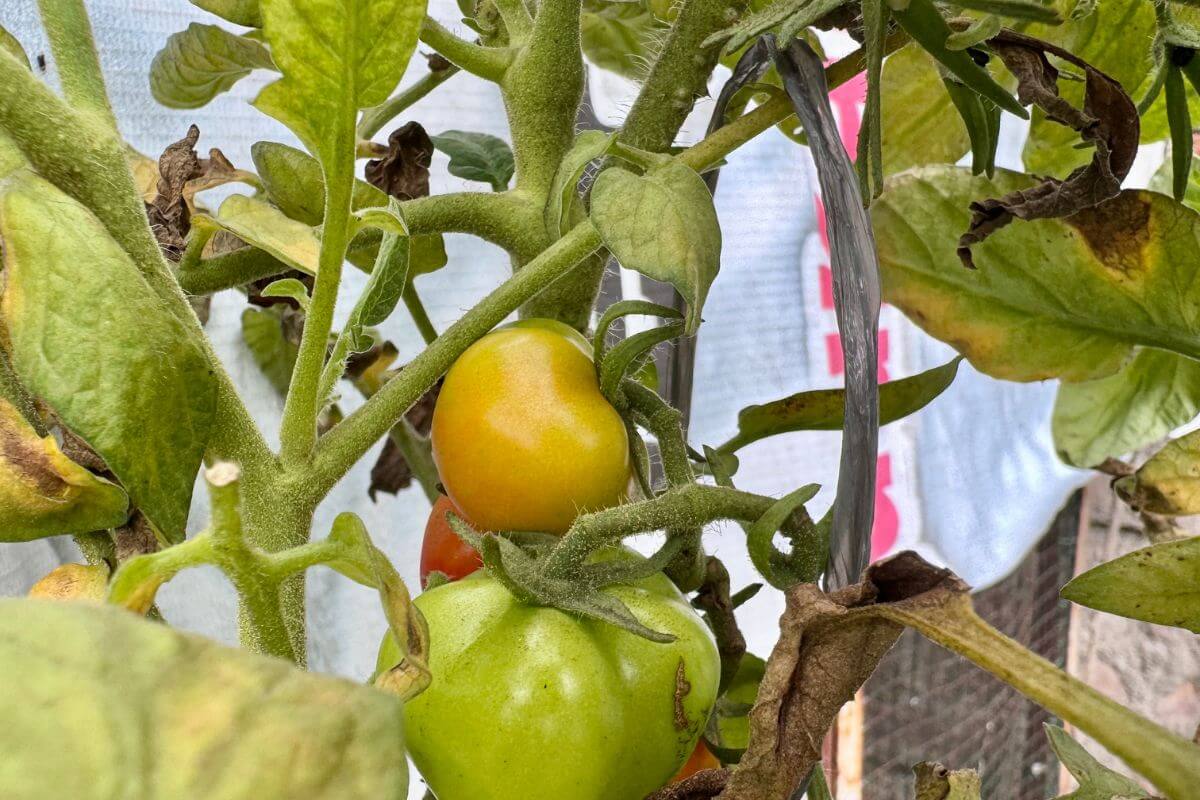
When the leaf tissue turns yellow whilst the veins remain green, this is known as chlorosis. This symptom is often associated with difficulty in absorbing certain nutrients, particularly iron or magnesium. Overwatering, constantly waterlogged potting mix or poor drainage may be the cause. Make sure water drains away properly from the pot and avoid keeping the compost constantly waterlogged.
As with many problems affecting tomatoes grown in pots, yellow leaves are often a sign of stress rather than disease. Before resorting to drastic measures, first check the watering, drainage and fertilisation.
Why are my plants so huge but not very productive?
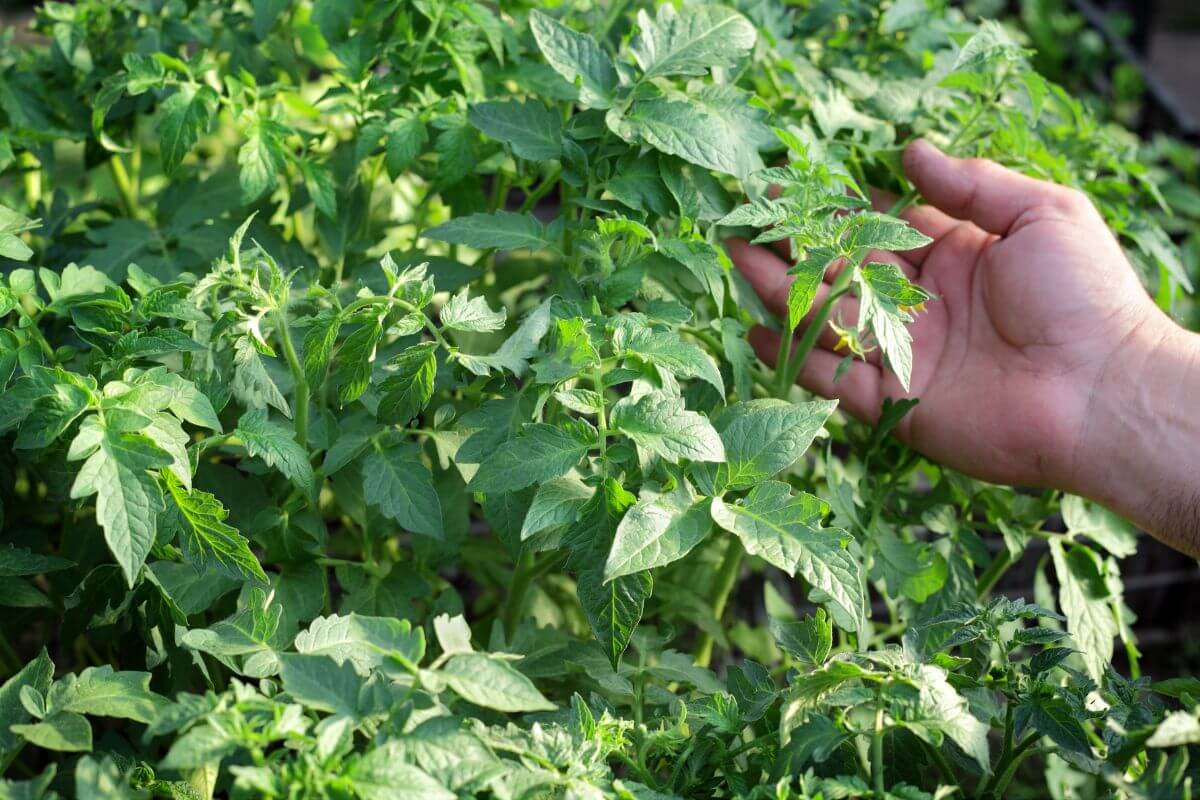
By mid-July, your container-grown tomato plant has turned into a veritable jungle. It towers above your head, its stems are thick and its foliage is a lush green. Yet there are few flowers and even fewer fruits.
The most common cause is an excess of nitrogen. Nitrogen is the element responsible for the growth of stems and leaves. When a tomato plant receives too much nitrogen-rich fertiliser, it ‘realises’ that it’s time to produce more foliage rather than fruit. It then channels its energy into producing new shoots and abundant foliage. When grown in containers, this problem sometimes arises when you fertilise too often with nitrogen-rich fertilisers.
Light can also be a factor. A tomato plant that does not receive enough sunlight will try to stretch towards the light source. It then becomes taller and more slender, but produces fewer flowers.
Finally, high temperatures can also reduce yield. When temperatures remain very high, especially at night, the flowers are not pollinated as effectively and may abort before forming fruit.
If your plant looks more like a forest than a vegetable patch, avoid adding any more fertiliser. Simply keep it well watered, ensure it gets as much sun as possible, and give it time to rebalance its growth. With a little patience, the fruit yield will often eventually catch up with the foliage.
Why aren’t my tomatoes turning red?
You’ve been watching your tomatoes grow for weeks. They’ve reached their full size, look perfectly healthy, yet stubbornly refuse to turn red. Before you start questioning your gardening skills, know that this is often nothing more than a temperature issue.
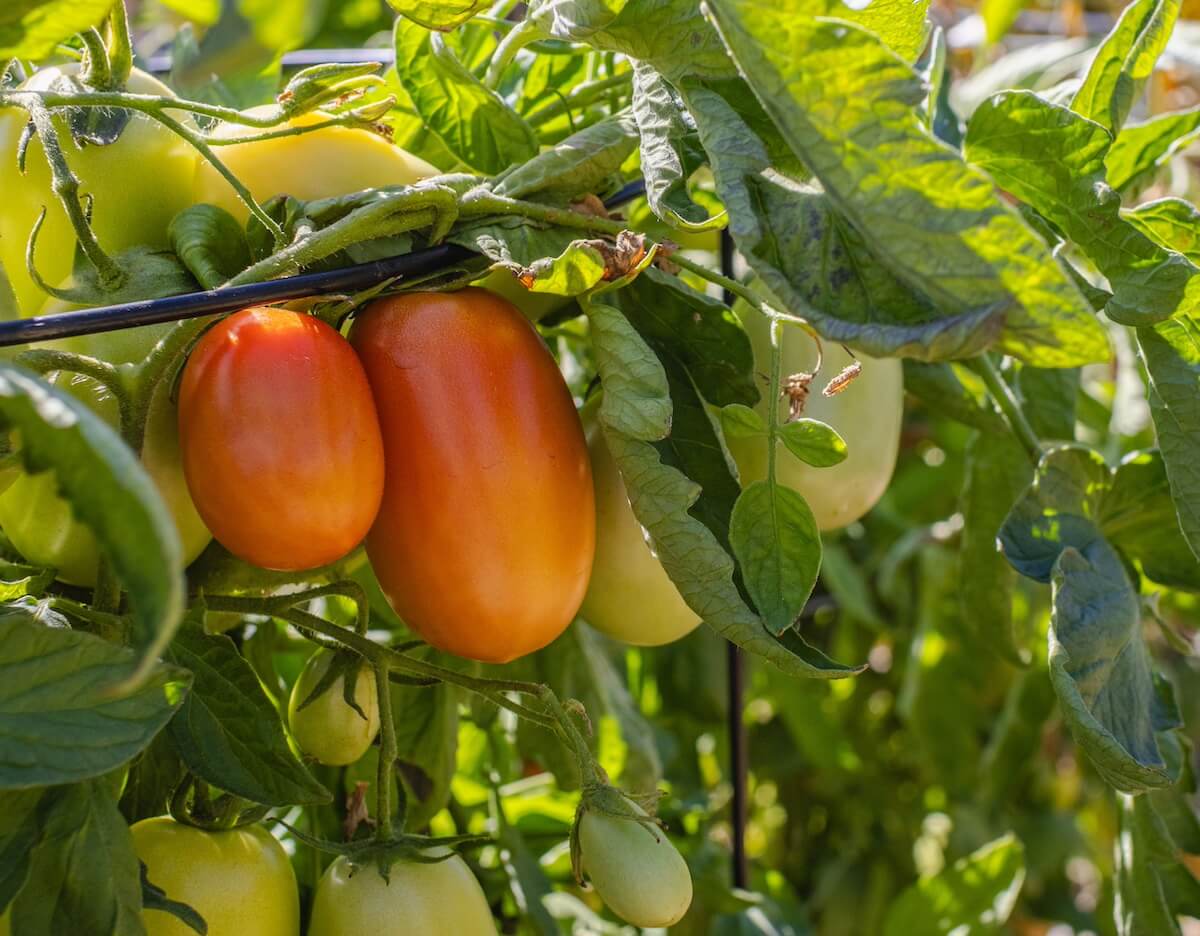
A tomato’s red color comes from a pigment called lycopene. This pigment is produced most efficiently when temperatures are between about 20 and 25°C (68–77°F). Once temperatures climb above 30–35°C (86–95°F), lycopene production slows dramatically and may nearly stop altogether. The fruits continue to ripen, but they can remain yellowish, orange, or greenish much longer than expected.
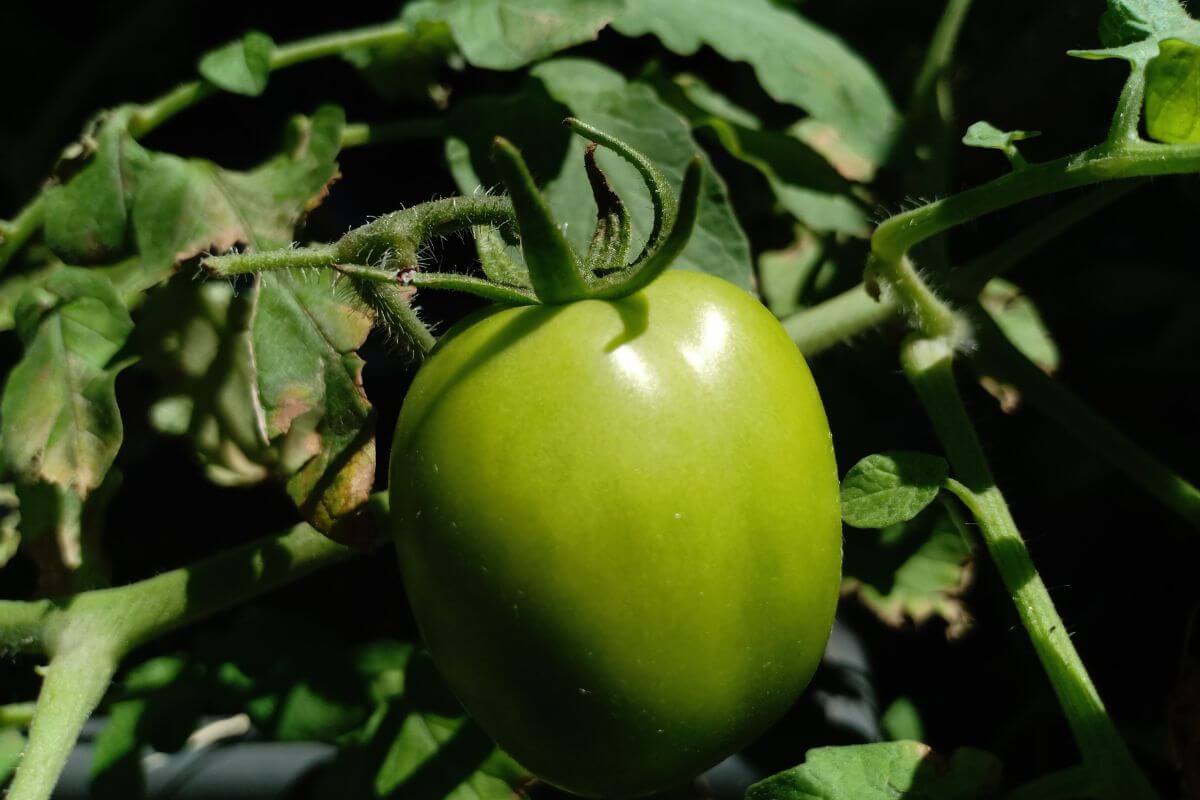
Tomatoes grown in containers are particularly prone to this phenomenon. Pots heat up quickly in the sun, especially if they are dark in colour or placed on a concrete patio or a south-facing balcony.
Fortunately, this delay is usually temporary. As soon as temperatures become milder again, lycopene production resumes and the fruits begin to take on their normal colour.
This is why it is best to avoid excessively hot locations. During heatwaves, some gardeners even put up a light shade cloth during the hottest hours of the day to limit the thermal stress on the plants.
Why are my plants wilting even though the compost is moist?
You go over to your pot and the leaves are drooping pitifully, as if the plant were dying of thirst. Yet, when you touch the compost, surprise! It’s still damp, even soggy.
Your first instinct might be to add more water. Resist the temptation. When a tomato plant wilts despite damp compost, the problem often lies with the roots, which are no longer able to absorb the available water.
The most common cause is a lack of oxygen. If the pot doesn’t drain properly, if the drainage holes are blocked or if water constantly pools in the saucer, the roots eventually suffocate. Even when surrounded by water, they then stop functioning properly.
Heat can also be a factor. On a balcony exposed to the sun, a dark plastic pot can become extremely hot. The finest roots, which are responsible for absorbing water, are particularly sensitive to these high temperatures.
Less commonly, an excessive build-up of fertiliser can hinder water absorption. This sometimes happens when you fertilise heavily without allowing the water to drain freely from the pot.
Make sure your pot has good drainage holes, avoid leaving water to stand in saucers for long periods, and protect containers from the scorching sun whenever possible. If you suspect an excess of fertiliser, watering thoroughly so that the water runs out of the bottom of the pot will help flush out the excess mineral salts.
What are these diseases?
As the summer progresses, tomato plants grow larger, air circulation through the foliage decreases, and thunderstorms create conditions conducive to leaf diseases. Fortunately, most problems can be kept under control with a few simple steps.
The most common illnesses
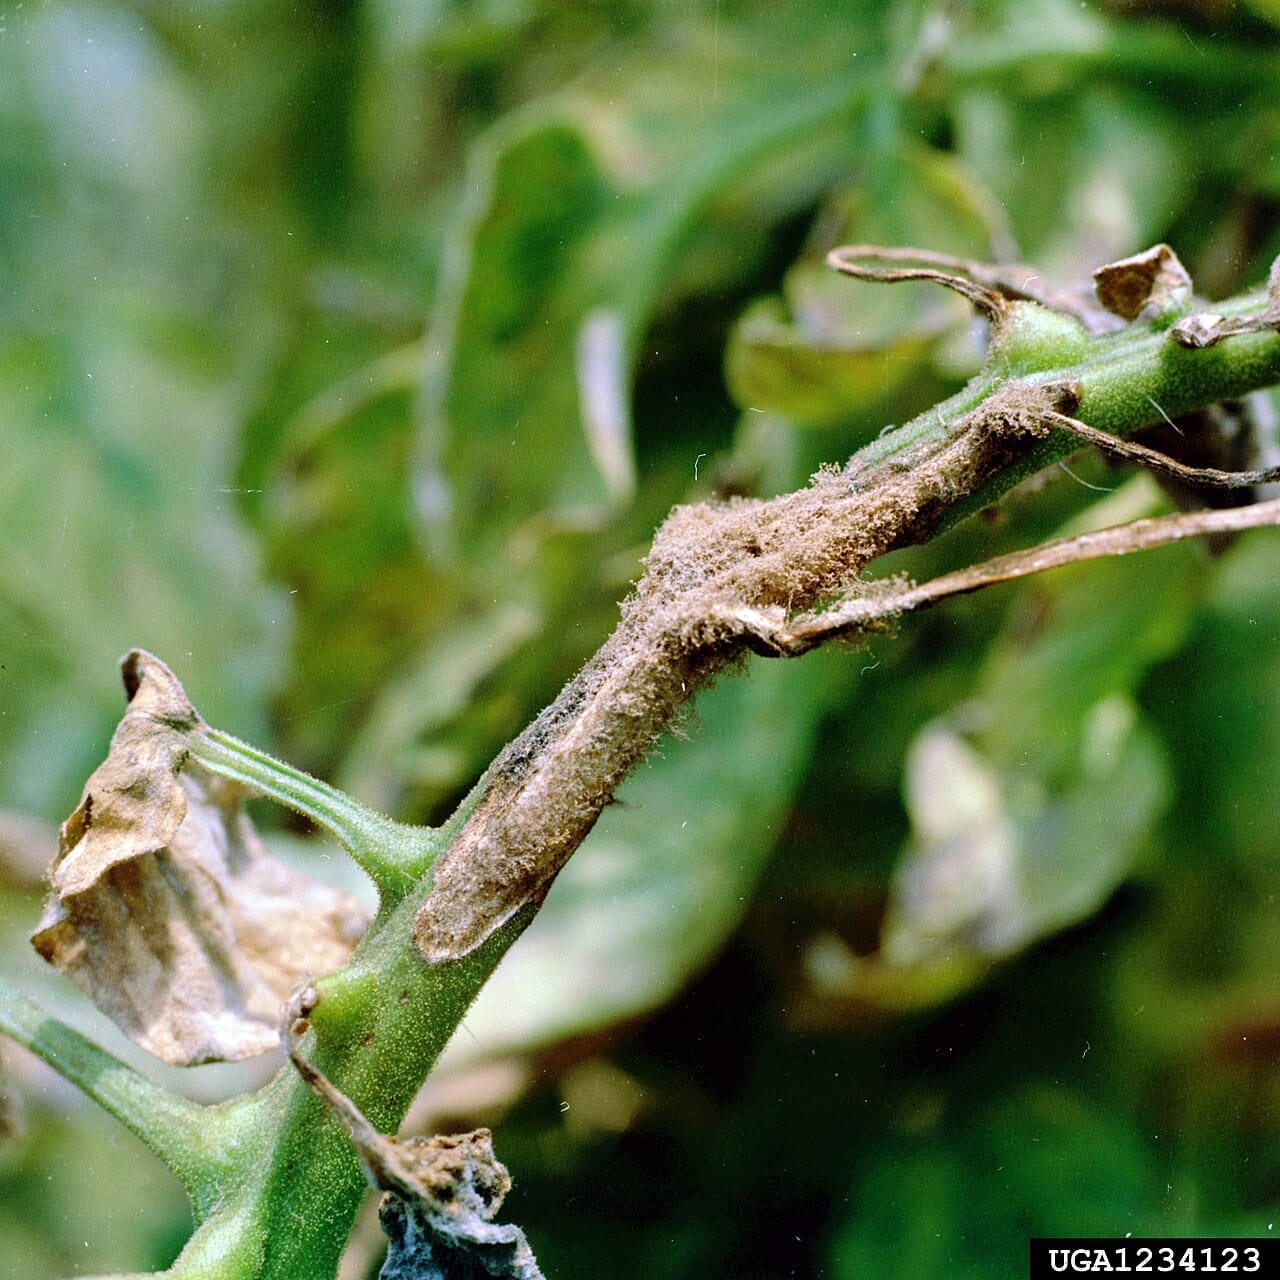
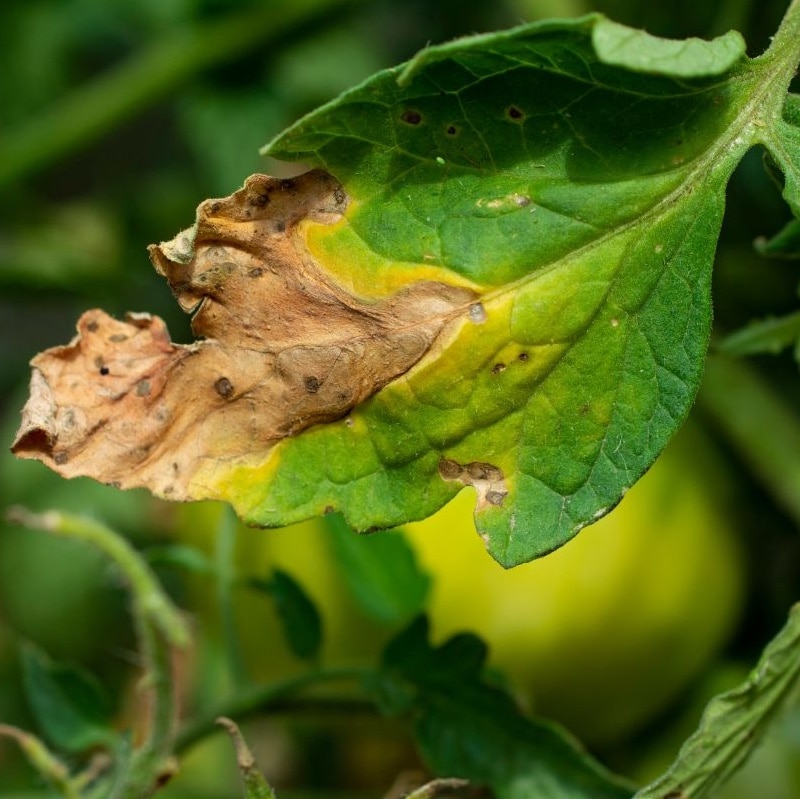
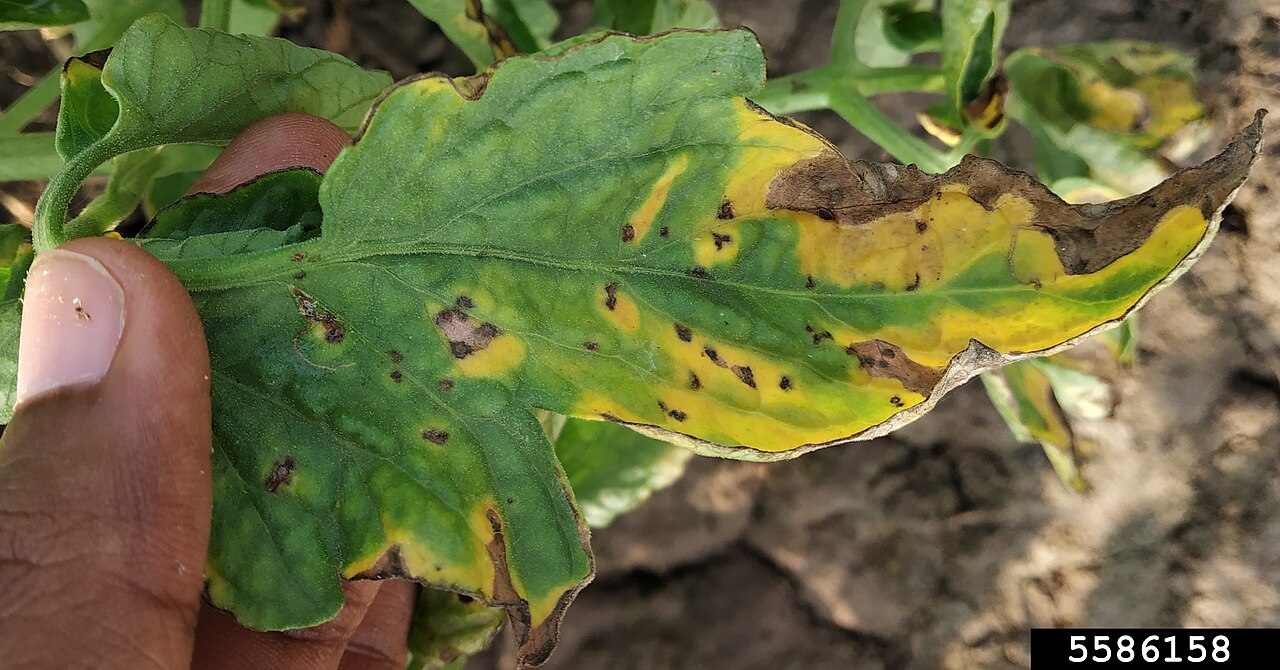
Early blight typically begins on the lower leaves of the plant. Brown circular spots appear, often with distinctive concentric rings that create a target-like pattern. The affected leaves gradually turn yellow, then dry up and die.
Septoria leaf spot, on the other hand, causes numerous small grayish or tan spots surrounded by darker margins. It mainly attacks the foliage and can quickly strip the lower part of the plant of its leaves.
Late blight, although less common, is far more destructive. It usually develops during cool, wet weather and causes large, water-soaked brown lesions on the leaves, stems, and sometimes the fruits. Under favorable conditions, it can spread very rapidly.
The laidback management method
The bad news is that a diseased leaf won’t recover. The good news is that you can often slow the spread of disease by improving the plant’s growing conditions.
Start by removing the lowest leaves, especially any that touch the potting mix or are within the first 20–30 cm (8–12 inches) of the plant. This helps reduce infection from fungal spores splashed up from the soil. Think of it this way: your tomato should have its legs exposed.
Also remove any heavily infected leaves as soon as you notice them, and dispose of them in the trash rather than the compost.
Next, make sure air can circulate freely around the plants. If your containers are crowded together, space them out as much as possible. If needed, a light thinning of the foliage can help the leaves dry more quickly after rain.
Finally, always water at the base of the plant rather than over the foliage. Leaves that stay wet for long periods provide ideal conditions for many diseases to develop.
As is so often the case with tomatoes, prevention is far more effective than treatment.
What are those little creatures?
In July, balconies and terraces become veritable mini-ecosystems. The heat attracts a host of tiny insects that feast on the tender sap of the tomatoes. Fortunately, most of them can be controlled without resorting to heavy-duty measures.
The main suspects
Aphids are the easiest pests to spot. Green, black, or pink, they cluster on young shoots and the undersides of leaves. As they feed, they often distort new growth and leave behind a sticky substance known as honeydew.
Spider mites (often called red spider mites) thrive in hot, dry conditions. Although they’re nearly invisible to the naked eye, their damage is easy to recognize: the leaves develop a fine speckled or stippled appearance before eventually turning yellow. In severe infestations, delicate webbing may appear between the leaves.
Whiteflies take flight in small clouds when the plant is disturbed. They feed primarily on the undersides of leaves, where they suck sap from the plant.
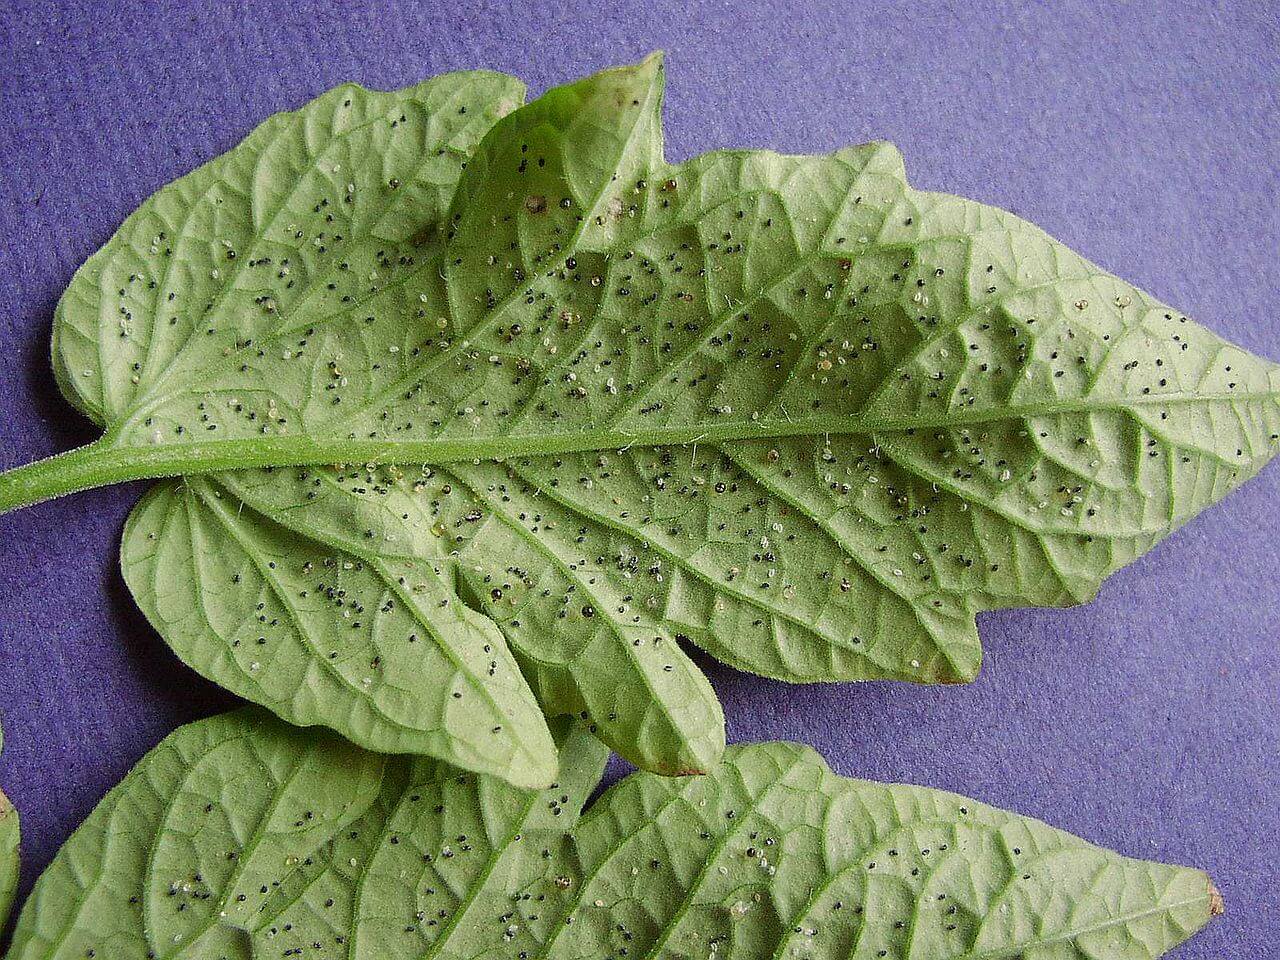
Thrips are tiny, slender insects that leave behind silvery or bleached patches on the foliage, often accompanied by tiny black specks of excrement.
Cutworms and other caterpillars are usually responsible for chewed leaves or holes bored directly into the fruits.
Flea beetles are small, black beetles that jump like fleas when disturbed. They chew numerous tiny, round holes in the leaves, giving them a characteristic “shot-hole” appearance. On well-established tomato plants, the damage is usually cosmetic, but heavy feeding can slow the growth of young plants.
The laidback approach to pest control
Your first line of defense is often the simplest: a strong spray of water. Aphids and spider mites can usually be dislodged by spraying the undersides of the leaves with enough force to knock them off without damaging the plant.
Caterpillars, on the other hand, are easy to remove by hand as soon as you spot them.
If an infestation persists, an insecticidal soap is generally effective against aphids, whiteflies, and many other soft-bodied insects. Spray it directly on the insects—especially the undersides of the leaves—and always follow the manufacturer’s directions.
Finally, planting a few nectar-rich flowers near your tomatoes can attract valuable allies such as hoverflies, green lacewings, and ladybugs. These beneficial predators will often take care of much of the pest control for you.
As is so often the case in the garden, the best treatment is early intervention. A handful of aphids is easy to manage; a colony that’s been thriving for three weeks is a very different story.
The Queen likes her peace and quiet
Having listed all these problems, I realise I may have given you the impression that growing tomatoes is a real struggle. Rest assured: in most cases, it’s much simpler than it seems.
Most of the problems observed in container-grown tomatoes are not caused by serious diseases or insect pests, but rather by various forms of stress. Tomatoes are plants that are highly responsive to their environment. Too much or too little water, a heatwave, a gust of wind or an imbalance in fertilisation can quickly lead to symptoms that are sometimes quite dramatic.
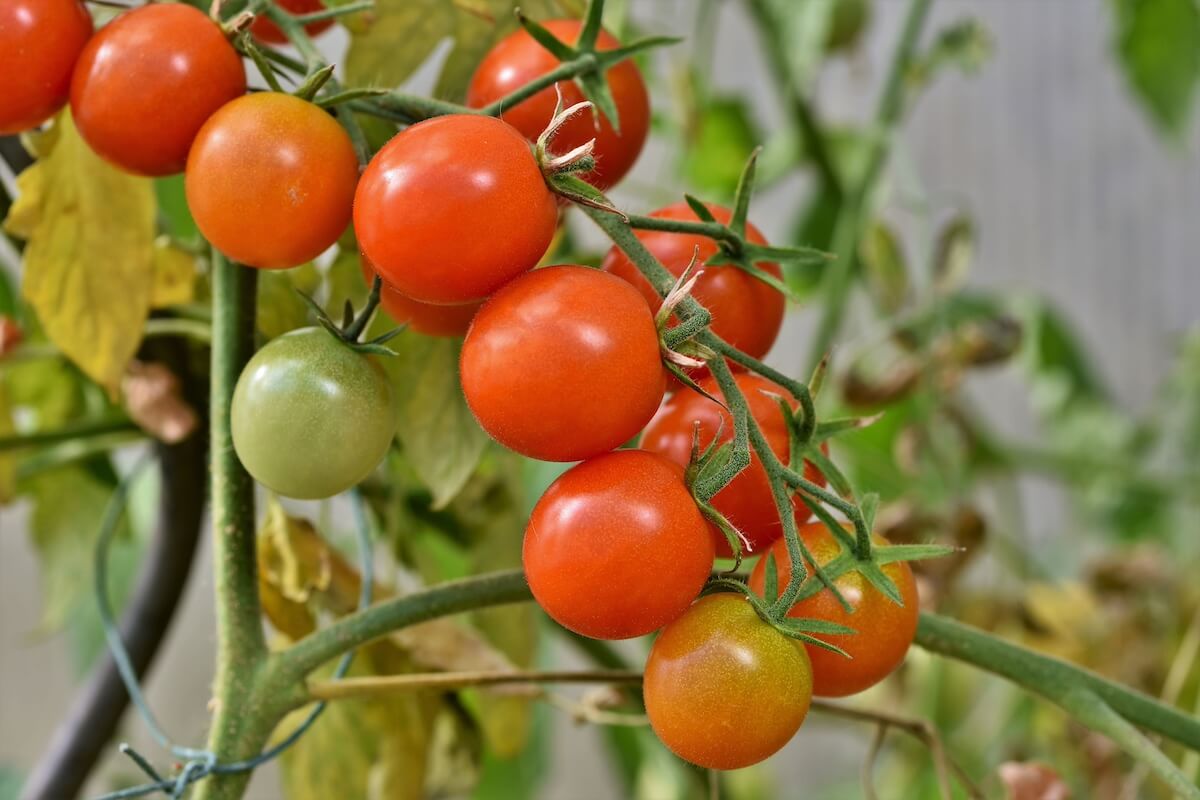
The good news is that most of these problems sort themselves out once conditions return to normal. When growing tomatoes, consistency is often more important than treatments.
So, before looking for a miracle cure, start by checking the watering, drainage, sunlight and fertilisation. Very often, the solution lies there.
Ultimately, despite its reputation as a diva, the tomato doesn’t require that much attention. Her Majesty simply prefers stable conditions, a bit of sun, water at the right time and, above all, to be left in peace.
Watching anime on Aniwatch has been convenient because the platform is easy to understand. The search function performs well, and browsing different categories helps discover hidden gems worth adding to personal watchlists.
I don’t think I had any of these issues when I grew tomatoes in containers. But I harvested very few tomatoes. Because SQUIRRELS ate them all, year after year. I no longer even try. I scrolled to see if you had a squirrel section…. alas.
Very timely article. It seems there is always something else to learn about tomatoes. Thanks!
Wow, an incredibly comprehensive list of all things tomato. Excellent! In my experience a regular watering and fertilizing routine helps avoid almost all of these problems. I live in a drier climate so most of the diseases aren’t much of a problem.