


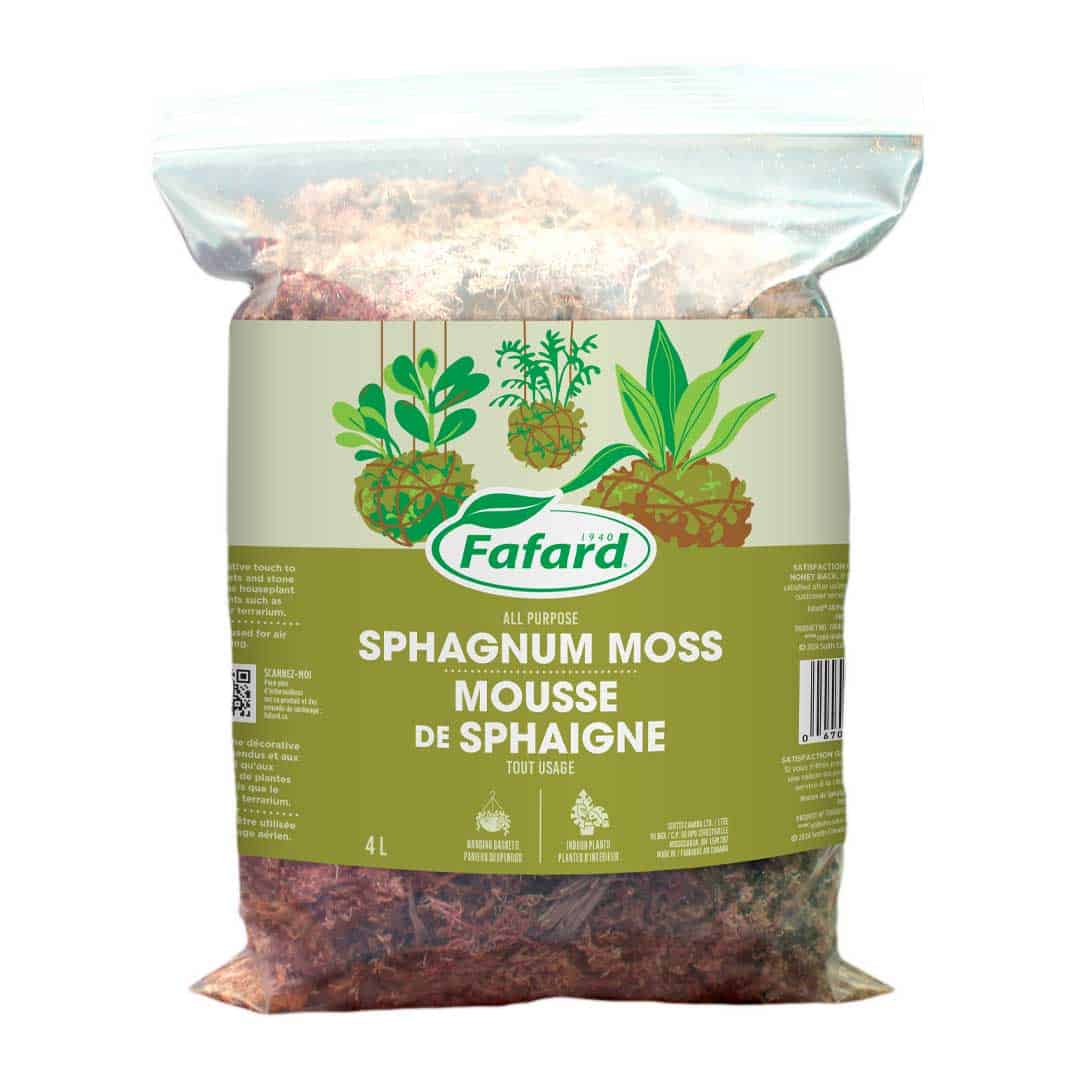
Many orchids sold in stores come in a growing medium made from sphagnum moss or compressed plant fibers. Although long-term cultivation in this type of medium is possible, it is more technically demanding and generally ill-suited to home gardening practices. It is therefore advisable to replace commercial sphagnum moss with a growing medium that is easier for orchid enthusiasts to manage. That is what we will explore in this third installment dedicated to the proper care of orchid roots.
Why are Phalaenopsis orchids often sold in sphagnum moss?
In an industrial setting, sphagnum moss offers several advantages for mass production. First, it is ideal for growing small seedlings. Thanks to its highly absorbent properties, it requires less water and minimal fertilization. Furthermore, the antiseptic properties of fresh sphagnum moss (which remains antibacterial and antifungal for several months) create a growing medium that is healthy enough to significantly reduce the need for pesticides in production greenhouses. It is therefore not surprising to find so many Phalaenopsis orchids sold in this type of growing medium. But that’s not all.
Some orchids are imported in a “temporary” growing medium
Under certain conditions, it is possible to import orchids that have recently been repotted with fresh sphagnum moss. This sphagnum moss, used temporarily, provides good protection against drying out and physical damage during transport. The antiseptic properties of fresh sphagnum moss also help prevent seizures by customs authorities.
Orchids in transit using this imported growing medium are often sold as is, giving the impression that they were grown in sphagnum moss, but this is not necessarily the case. Unfortunately, sphagnum moss is often ill-suited for growing mature orchids. It retains far too much water, which causes the roots to suffocate, as we explained in a previous article.
You will therefore need to completely repot these plants as soon as flowering ends, when the orchid begins to produce new roots. This is generally necessary after 5 to 6 months, as the antiseptic properties of sphagnum moss decline very rapidly after this period. Furthermore, sphagnum moss gradually becomes toxic as it breaks down and accumulates fertilizer salts.
Replacing the sphagnum moss is a relatively simple task
There are a wide variety of options for replacing sphagnum moss with a new growing medium better suited to indoor cultivation. Depending on your growing conditions and the specific plants you’re repotting, you should choose the option that best suits your particular situation.
To illustrate the process, we’ll use a Phalaenopsis here, which we’ll repot into a high-quality bark-based growing medium. This type of medium is easy to find at garden centers or through a local orchid society. It should typically last three to four years under normal home-growing conditions. Some people add perlite and other fillers, but this is generally not essential for most orchids. If you are familiar with a particular potting mix, it may be best to use it as is to avoid introducing unnecessary risks.
Step 1: Soak the plant to loosen the roots and make it easier to remove from the pot
It is recommended to use a 0.5% hydrogen peroxide solution for the preliminary soak, to hydrate and disinfect the roots. The soak should last about 15 minutes. If there are several plants to repot, the solution should be refreshed for each plant. Gather the necessary supplies during this soaking period so that you can proceed with repotting quickly.
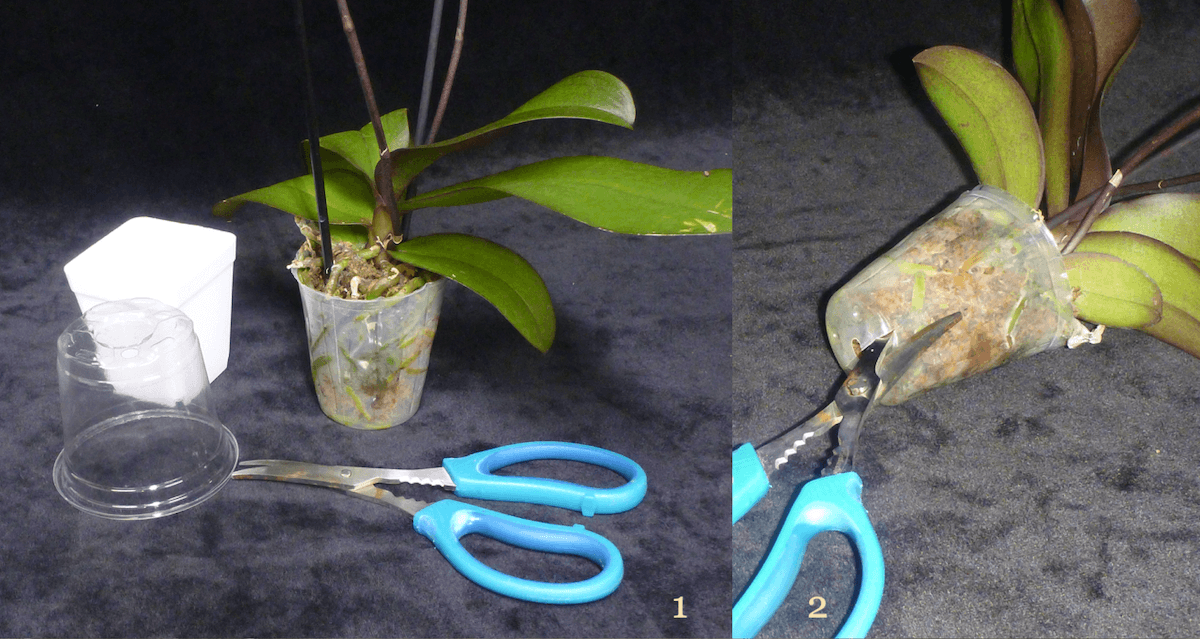
Step 2: Remove the plant from its pot and loosen the sphagnum moss
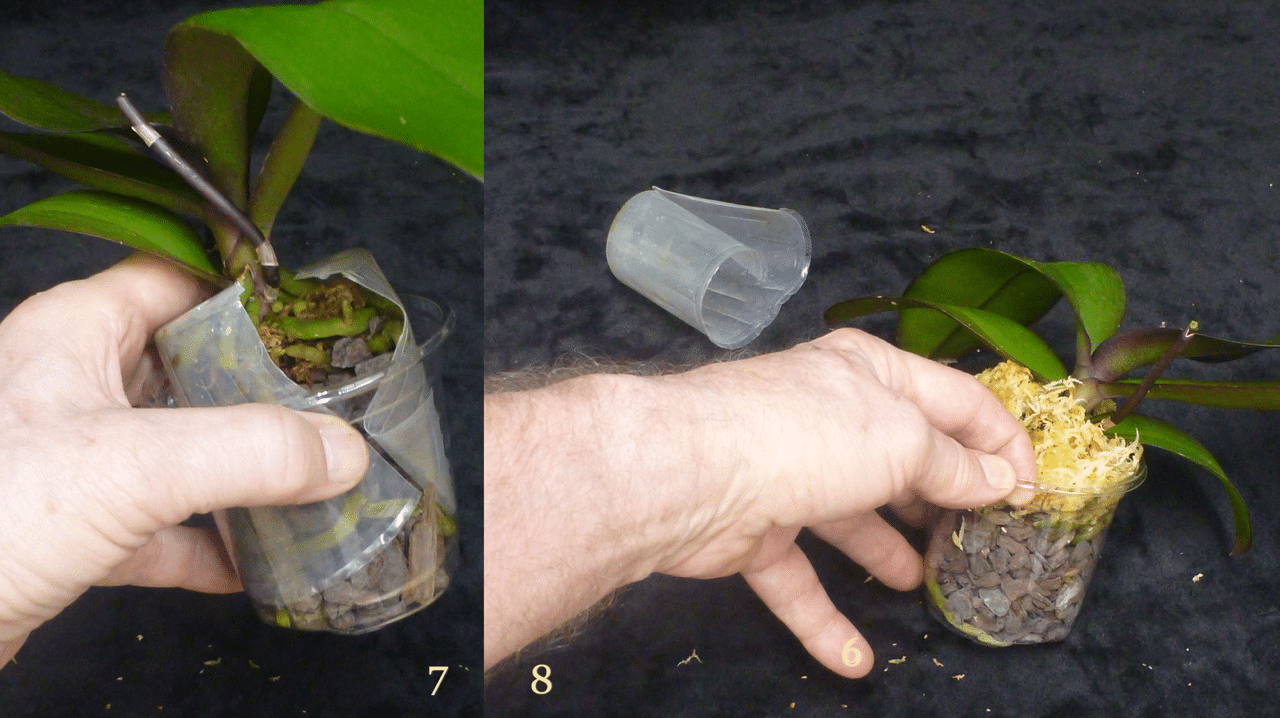
When repotting a Phalaenopsis, it is recommended to cut the soft plastic pot open on one side so that you can “unfold” it without applying too much pressure to the roots.
Keep this small, slit pot aside, as we’ll need it later.
Generally, the roots are found around the edge of the sphagnum moss ball, with a few rare roots pointing inward toward the moss. It should therefore be fairly easy to “unroll” the roots to free the sphagnum moss ball, especially if it’s well-moistened. All that remains is to remove any excess filaments still clinging to the roots. You can also rinse the roots under the tap, but this step is optional.
Once the roots are fully exposed, you can inspect and remove any diseased, dead, or damaged roots. This is generally easy to do using long-nosed scissors, which have been cleaned and disinfected beforehand with 70% rubbing alcohol. Handle the plant gently, as it is in a very fragile state at this point.
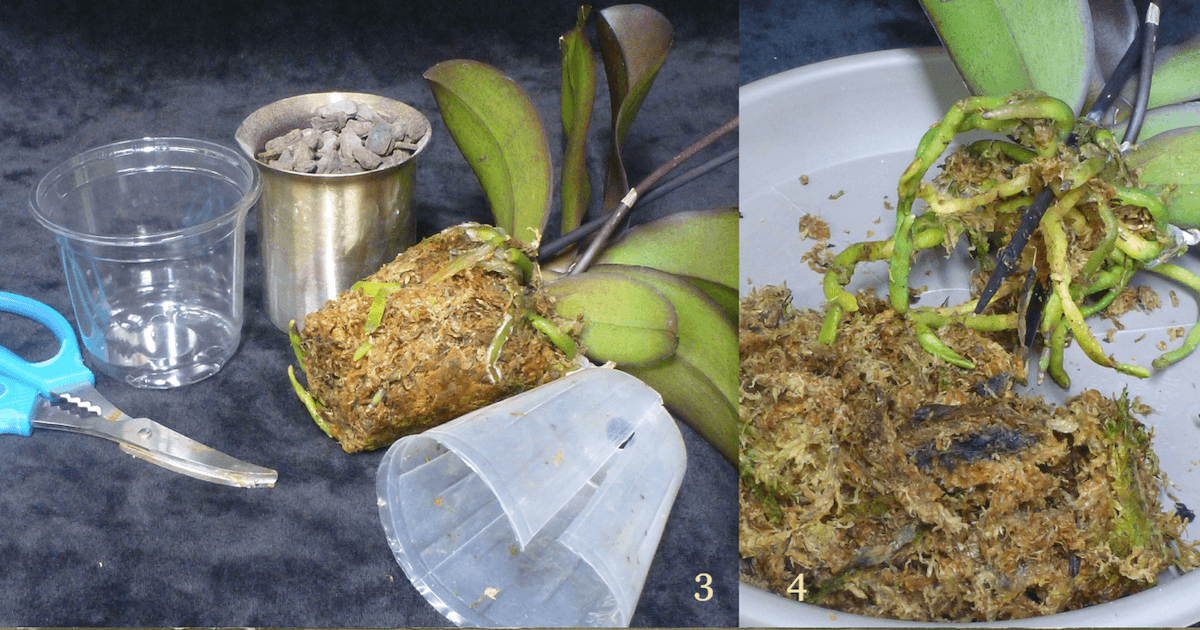
Step 3: Reform the central root ball using the new potting mix
To minimize the stress associated with repotting, try to maintain the same root structure in the new growing medium. To do this, turn the plant upside down and place the old plastic pot just beneath the roots (see photo). The old flexible pot will thus serve as a temporary container that you’ll fill with bark to reform the central root ball in a configuration similar to the old sphagnum ball. Using gentle vibrations, settle the bark particles so they fill all the small gaps between the roots.
Once the pot is well-filled, place the new pot over the reconstituted root ball, much like a hat, which will trap the bark between the two pots.
At this point, you can straighten the plant (foliage facing upward) without risking the bark particles scattering, while keeping the roots in a position close to their original configuration. Then gently remove the flexible pot to allow for the final filling of the new container with fresh growing medium.

Step 4: Surface treatment is recommended but optional
To properly secure the plant in its new pot, many experienced orchid growers recommend covering the surface of the potting mix with fresh sphagnum moss (known as “top-dressing”). This practice is very useful and easy to do. Simply place about one centimeter of moss on top of the bark to form a sort of sphagnum net on the surface of the pot. Then gently press the moss around the edge of the pot to secure it in place. Avoid pressing the moss near the roots so as not to damage them. This protective layer will limit the dispersion of loose bark particles and stabilize the orchid in its new container. Later, when the plant resumes root growth, this layer of sphagnum moss on the surface will be very useful for guiding the aerial roots toward the substrate.
Step 5: Identify the orchid and water it
With minimal effort, you can replace sphagnum moss with a much more durable and easier-to-manage growing medium. The advantage of this method is that it minimizes root disturbance, as the roots generally maintain the same spread within the medium before and after repotting.
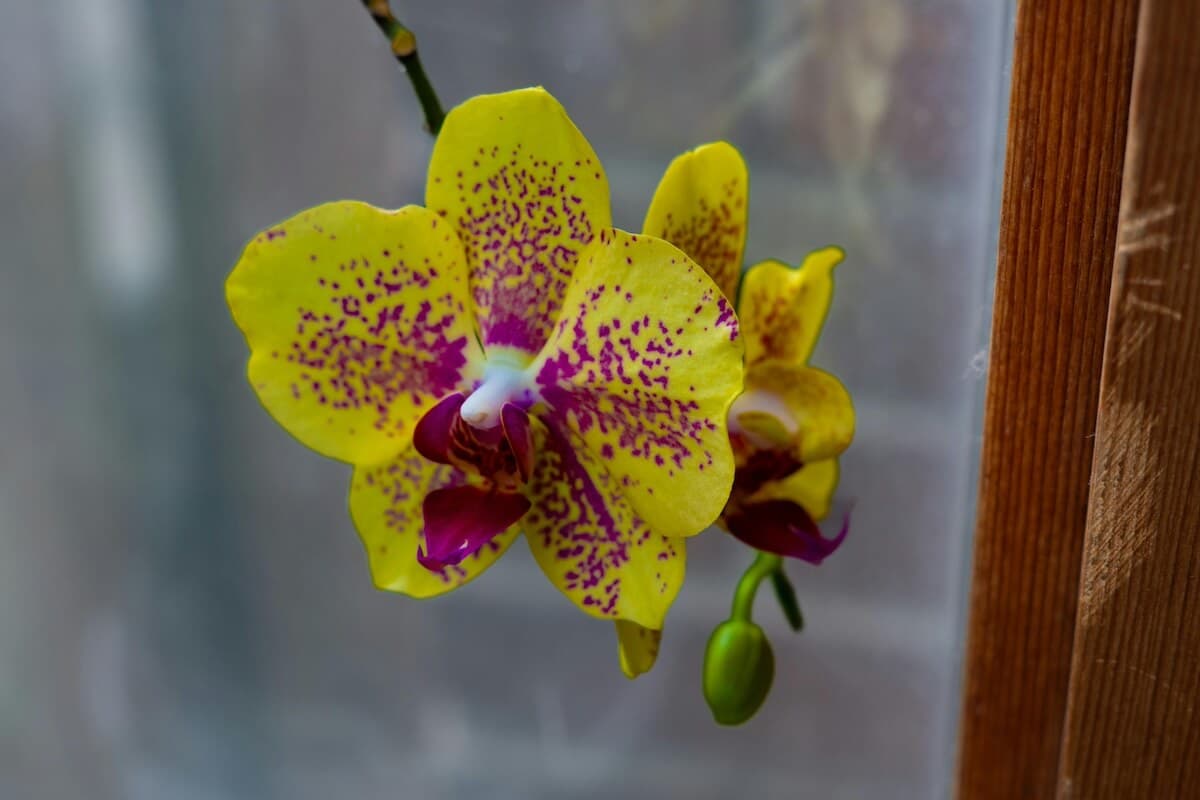
If your orchid has an identification tag, don’t forget to transfer it to the new container. If it doesn’t, I recommend creating one and inserting it into the pot. On it, you should write the botanical genus (e.g., “Phalaenopsis hybrid”), the flower color (e.g., “creamy yellow”), the repotting date (e.g., “P: 2025-12-30”), and any other information that will help you track the plant’s growth. Sticker labels (such as those from the P-Touch brand) are highly recommended, as they are easier to read than sticks inserted into the pot.
Once watered, the plant can be returned to your growing area, where it should quickly resume growth.
